AI prompts
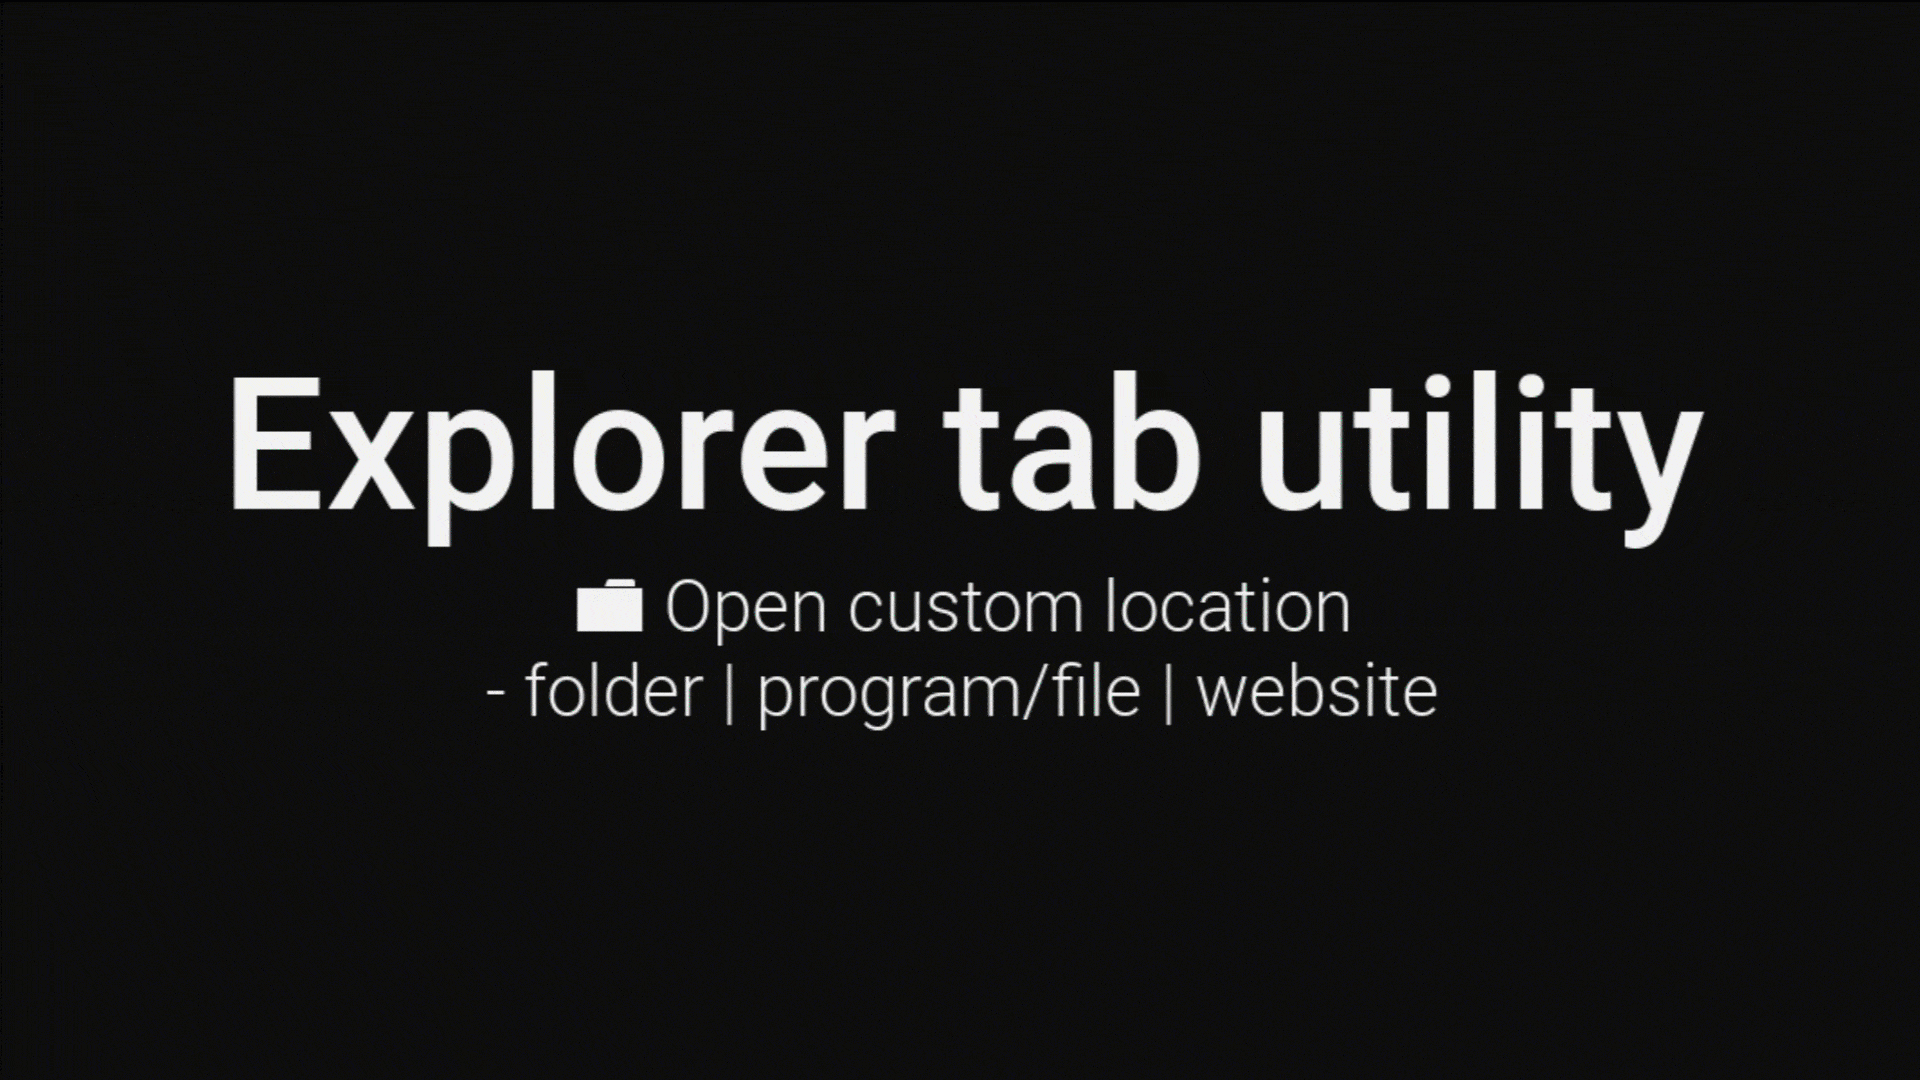
base on 🚀 Supercharge Windows 11's File Explorer: Auto-convert windows to tabs, duplicate tabs, reopen closed ones, and more! # Explorer Tab Utility
> [!TIP]
> Force new File Explorer windows to open as tabs in Windows 11, making your workflow cleaner and more organized!
<div align="center">
<img src="https://cdn.jsdelivr.net/gh/w4po/ExplorerTabUtility@master/Assets/ExplorerTabUtilityLogo.gif" alt="Explorer Tab Utility Logo">
[](https://opensource.org/licenses/MIT)
[](https://www.microsoft.com/windows/windows-11)
[](https://dotnet.microsoft.com/download)
[](https://dotnet.microsoft.com/download/dotnet-framework)
</div>
> [!IMPORTANT]
> This application requires Windows 11 (22H2 Build 22621 or later) with the File Explorer Tabs feature.
## 🤔 Why Explorer Tab Utility?
<div align="center">
<img src="https://cdn.jsdelivr.net/gh/w4po/ExplorerTabUtility@master/Assets/TheWhy.png" alt="Why use Explorer Tab Utility">
</div>
Say goodbye to cluttered desktops with multiple Explorer windows! Explorer Tab Utility automatically converts new windows into tabs, providing a cleaner and more organized file management experience.
## ✨ Features
<details>
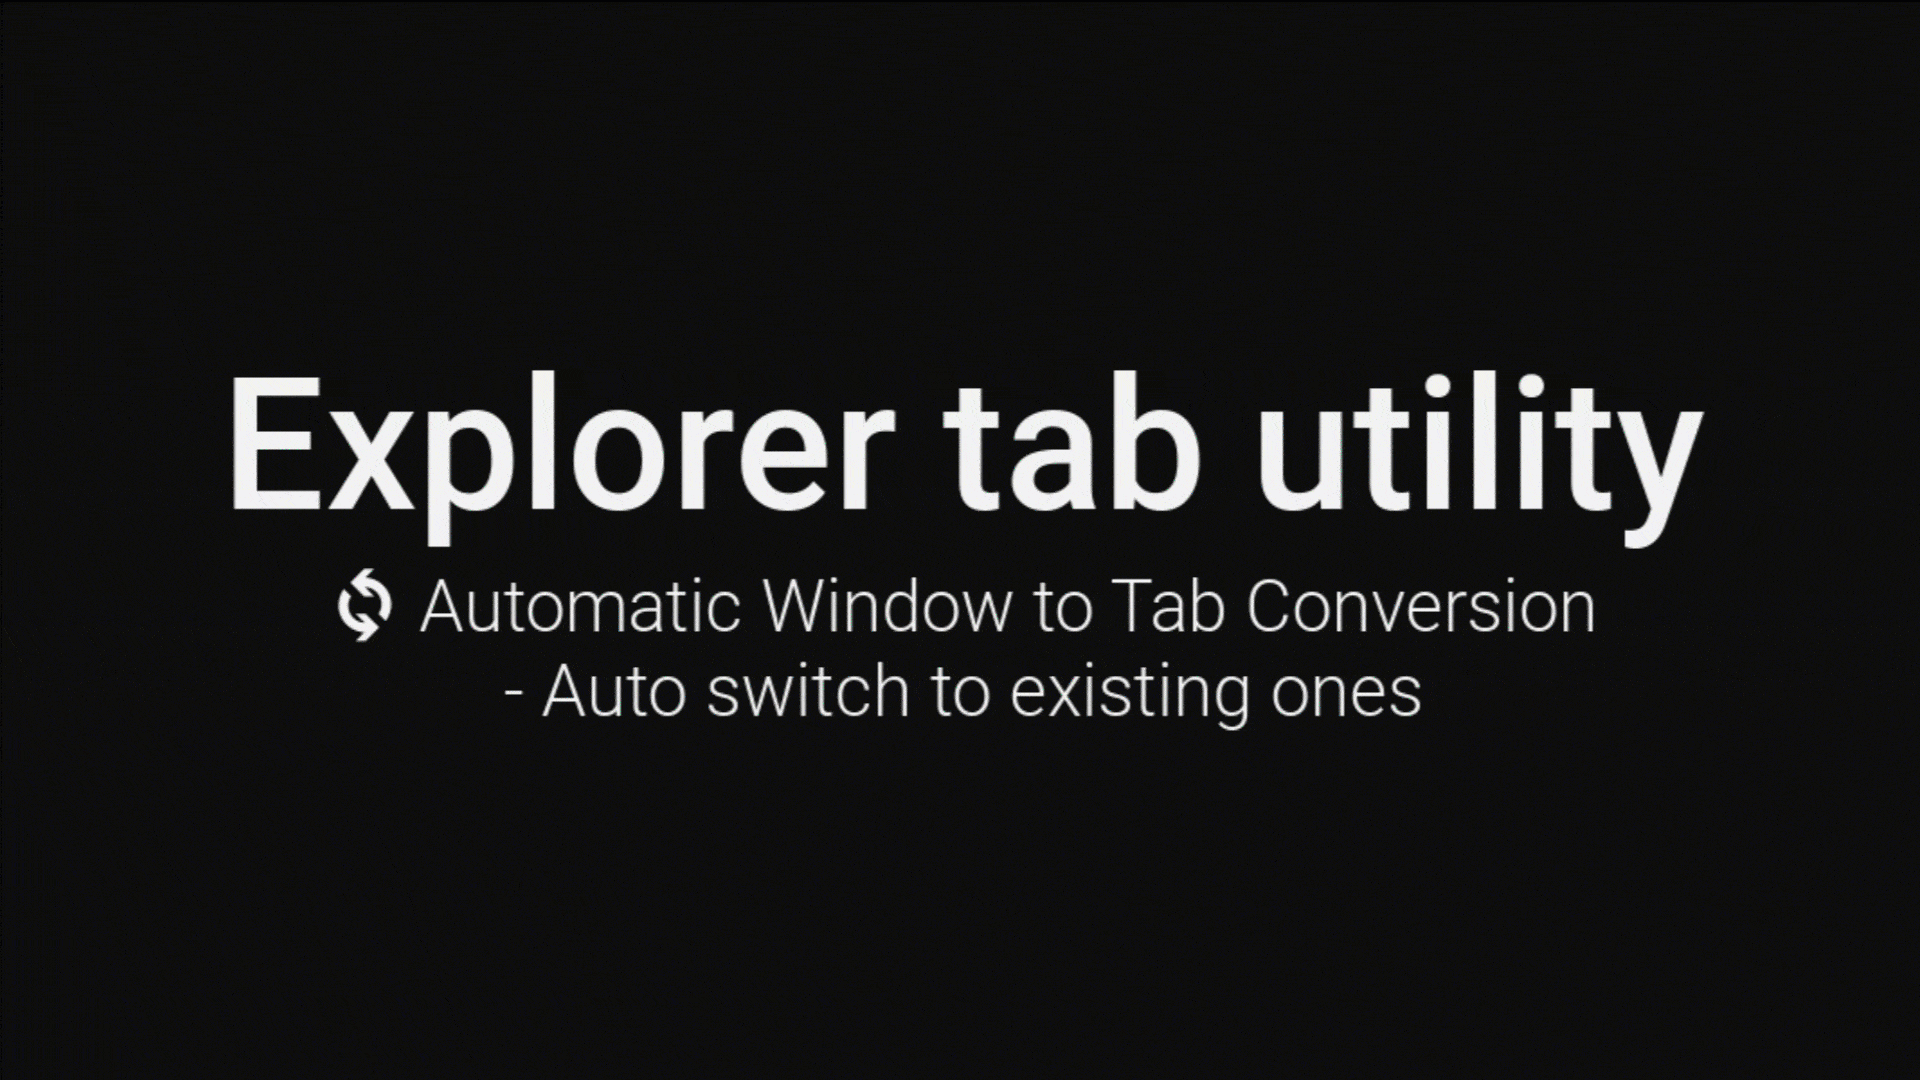
<summary>🔄 Automatic Window to Tab Conversion</summary>
- Seamlessly converts new Explorer windows into tabs
- Switches to existing tabs if path is already opened
- Supports virtual desktop switching with a hotkey
- Supports attaching/detaching tabs
- Handles "Show in folder" file selection elegantly
- Handles opening multiple tabs at once
**See it in action:**
</details>
<details>
<summary>🖨️ Duplicate Current Tab</summary>
- Quickly duplicate the current tab/window
- Choose whether to duplicate as a tab or new window (toggle `Tab` option)
- Preserves the current location and selected items
**See it in action:**

</details>
<details>
<summary>♻️ Reopen Closed Tabs</summary>
- Reopen previously closed tabs/windows
- Choose whether to reopen as a tab or new window (toggle `Tab` option)
- Restores the exact location and selected items
- History is saved across application restarts (enable "Save closed history" in settings)
**See it in action:**

</details>
<details>
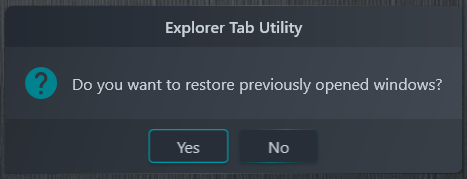
<summary>🔄 Restore Previous Windows</summary>
- Automatically restore previously opened windows if File-Explorer restart/crash or system reboot
- Configurable via "Restore previous windows" setting
- Confirmation dialog allows you to choose whether to restore windows on first launch
</details>
<details>
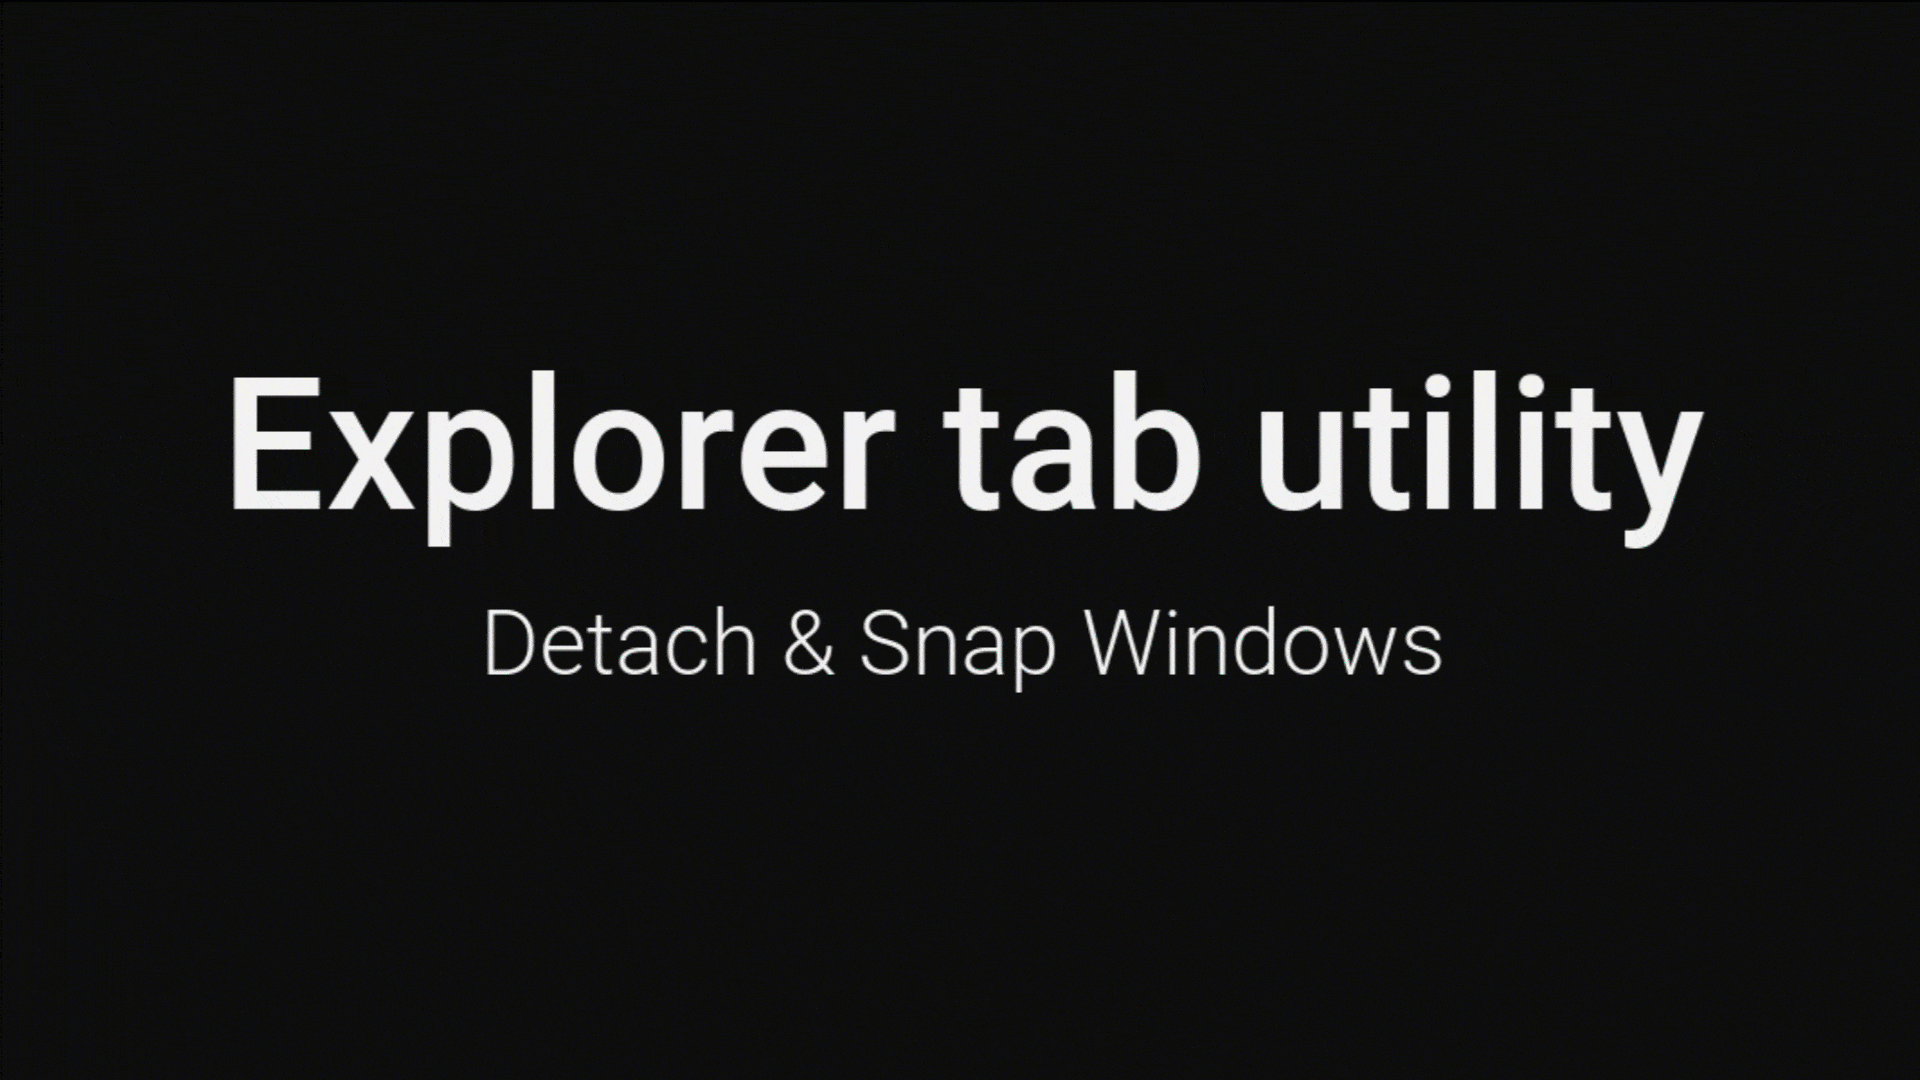
<summary>📋 Detach & Snap Windows</summary>
- Detach current tab to a new window
- Snap windows to screen edges (right/left/top/bottom)
- Chain multiple actions with a single hotkey
- Example setup (CTRL + Q):
1. First profile: Detach current tab
2. Second profile: Snap original window to the left
3. Third profile: Snap new window to the right (with customizable delay)
- Customize delays to match your system's performance
**See it in action:**
</details>
<details>
<summary>⬅️ Navigate Back & Forward</summary>
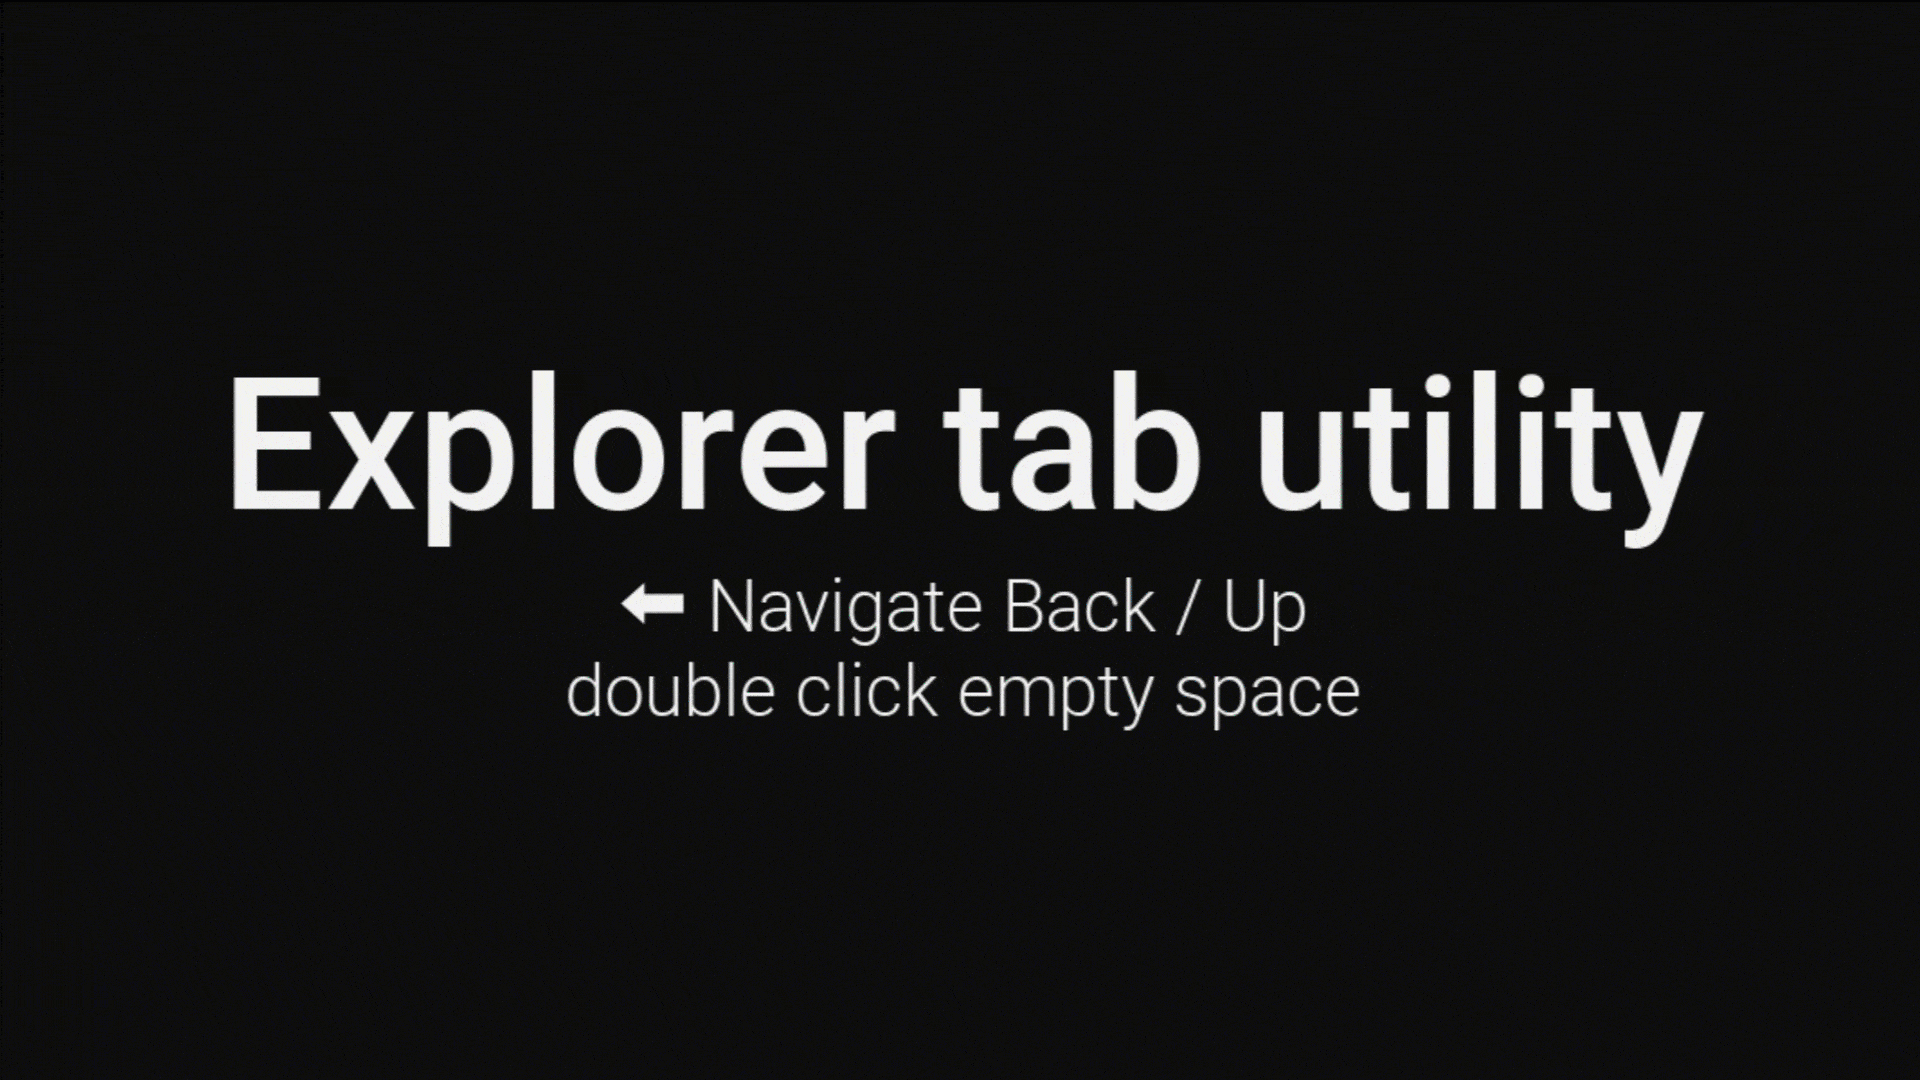
- Navigate back/forward/up in File Explorer using:
- Keyboard shortcuts (customizable)
- Mouse clicks on any empty space in the folder
- Perfect for quick navigation between directories
**See it in action:**
</details>
<details>
<summary>📁 Custom Path Navigation</summary>
- Assign hotkeys to quickly open your favorite locations
- Choose whether to open as a tab or new window (toggle `Tab` option)
- Supports multiple formats:
- Standard paths: `C:\Users\Documents`
- Environment variables: `%USERPROFILE%\Downloads`
- Windows CLSID paths: `{A8CDFF1C-4878-43be-B5FD-F8091C1C60D0}` (Special Folders)
- Programs and files: `C:\file.txt`
- URLs: `https://github.com/w4po/ExplorerTabUtility` (opens in default browser)
- Perfect for frequently accessed locations
- Instant access to system folders using CLSIDs
**See it in action:**
</details>
<details>
<summary>🔍 Tab Search/Switcher</summary>
- Quickly find and switch between open Explorer tabs/windows
- Search by typing part of a folder name or path
- Keyboard navigation with up/down arrows and Enter to select
- Special modifiers for different actions:
- Default: Switch to existing tab or open location in a new tab
- SHIFT key: Open selected location in a new window instead of a tab
- CTRL key: Duplicate the tab even if it already exists
- Clear recently closed windows history with a single click

</details>
<details>
<summary>🪟 Force New Window with Ctrl+Shift</summary>
- Hold Ctrl+Shift while opening a location to force it to open as a new window
- Temporarily overrides the window hook and tab reuse settings
- Perfect for when you need a separate window without disabling the tab functionality
</details>
<details>
<summary>⚡ Performance & Reliability</summary>
- Lightweight and resource-efficient
- Fast and responsive tab creation
- Stable COM-based implementation
- Reliable window state management
</details>
## 🚀 Getting Started
1. Download the latest version from the [Releases](https://github.com/w4po/ExplorerTabUtility/releases) page or install it via `winget` or `choco`:
```powershell
winget install w4po.ExplorerTabUtility --interactive
```
```powershell
choco install explorertabutility --version 2.5.0 --params "/interactive"
```
2. Run the application
3. Look for the tray icon and you're ready to go!
## ⚙️ Configuration
> [!NOTE]
> The application runs in the system tray minimized by default.
> To configure it, double-click or right-click the tray icon.
<details>
<summary>🔧 General Settings</summary>
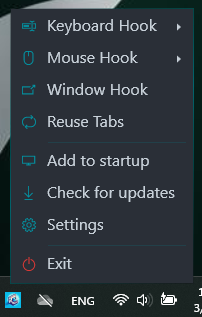
- **Window Hook**: Enable/disable automatic window-to-tab conversion
- **Reuse Tabs**: Switch to existing tabs instead of opening duplicates
- **Keyboard Hook**: Enable/disable keyboard shortcuts
- **Mouse Hook**: Enable/disable mouse navigation features
- **Startup**: Configure automatic startup with Windows
- **Settings Persistence**:
* Your settings are stored in a JSON file located in your AppData folder:
```
%APPDATA%\ExplorerTabUtility\settings.json
```
If you need to reset to default settings, simply delete the settings.json file.
</details>
<details>
<summary>⚙️ Preferences</summary>
- **Auto update**: Automatically check for updates on startup to ensure you're always using the latest version
- **I have theme issues**: Use an alternative window hiding method that preserves your custom File Explorer theme. Enable this if you experience theme-related issues
- **Save closed history**: Save recently closed windows for reopening later (ReopenClosed, Tab Search)
- **Restore previous windows**: Restore previously opened windows after restart or crash
- **Hide tray icon**: Hide the system tray icon for a cleaner taskbar experience.
* You must first configure a hotkey with the `ToggleVisibility` action before enabling this option
</details>
<details>
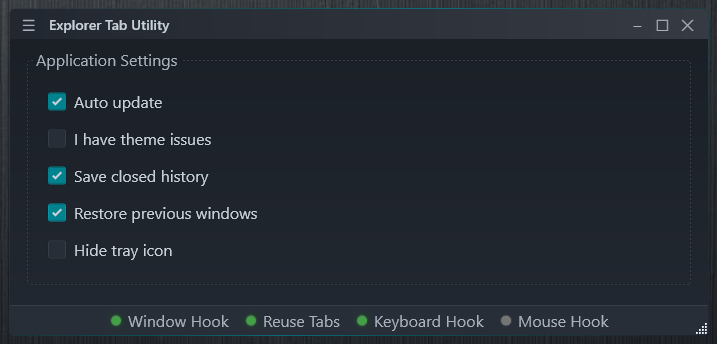
<summary>⌨️ Hotkey Profile Management</summary>
### Profile Options
- Create new profiles
- Import profiles from file
- Export profiles to file
- Enable/disable individual profiles
### Profile Settings
Each profile contains the following settings:
1. **Basic Configuration**
- Hotkey: Set keyboard shortcut (supports modifier keys)
- Scope: Global (system-wide) or Explorer (only in File Explorer)
- Action Type:
- `Open`: Open a specific location
- `Duplicate`: Duplicate the current tab
- `ReopenClosed`: Reopen the last closed location
- `TabSearch`: Open the tab search/switcher popup
- `NavigateBack`: Navigate back in the current tab
- `NavigateForward`: Navigate forward in the current tab
- `NavigateUp`: Navigate up one directory level
- `SetTargetWindow`: Mark the current window as the target for new tabs
- `ToggleWinHook`: Toggle the window hook on/off
- `ToggleReuseTabs`: Toggle tab reuse on/off
- `ToggleVisibility`: Show/hide the main window
- `DetachTab`: Detach the current tab to a new window
- `Snap`: Snap the current window to the screen edges (right/left/top/bottom)
- Path Field (for `Open` action)
- Optional: Leave empty to open new tab
- Supports multiple path formats (see Custom Path Navigation section)
2. **Advanced Settings**
- Execution Delay: Slider to set delay before action execution
- Key Handling: Toggle whether hotkeys are passed to other applications
- Profile Deletion: Remove unwanted profiles
> [!TIP]
> Use the "Handled" toggle to prevent or allow hotkey propagation to other applications that might be listening for the same key combination.
> [!NOTE]
> The `SetTargetWindow` action lets you choose which Explorer window will receive new tabs. This is useful when you have multiple Explorer windows open or working on different virtual desktops and want to control where new tabs appear.
</details>
## 🔧 Technical Details
<details>
<summary>Implementation Overview</summary>
### Core Components
#### 1. 🔌 COM Integration
- Direct interaction with Windows Shell through native COM interfaces:
- `Shell32`: Core shell functionality and file system operations
- `SHDocVw`: Explorer window and tab management
- Custom COM interface implementations for reliable shell interactions
- Efficient PIDL (Pointer to ID List) handling for file system operations
- Thread-safe COM object lifecycle management
#### 2. 🪟 Window Management
- Advanced window tracking and state management:
- Concurrent collections for thread-safe window tracking
- Efficient tab handle caching and validation
- Smart window-to-tab conversion logic
- Support for special folder navigation (CLSID paths)
#### 3. ⚡ Process & Event System
- Robust Explorer process monitoring:
- Automatic recovery from Explorer crashes
- Event-driven architecture for responsive UI
- Efficient window event hooking
- Asynchronous operation handling:
- STA (Single-threaded Apartment) task scheduler
- Non-blocking COM operations
- Proper synchronization with SemaphoreSlim
#### 4. 🚀 Performance Optimizations
- Smart caching mechanisms:
- Window handle caching
- Path comparison optimization
- Tab state tracking
- Efficient resource management:
- Proper COM object disposal
- Memory-efficient collections
- Minimal window recreation
#### 5. 🎨 Modern UI
- Modern WPF-based user interface:
- XAML-based UI components for better flexibility and design
- Custom themes and styles in dedicated XAML files
- Improved visual consistency with Windows 11 design language
- Enhanced system tray integration:
- Modern WPF-based TaskbarIcon implementation
- XAML-based context menu with Windows 11 iconography
- Custom icons and hover effects for better visual feedback
- Tab Search popup with modern styling and keyboard navigation
- About page with developer information and support options
### Key Technologies
- .NET 9 and .NET Framework 4.8.1
- Windows COM APIs
- Shell32 and SHDocVw interfaces
- Native P/Invoke
- Advanced threading with STA scheduler
- Concurrent collections for thread safety
- WPF (Windows Presentation Foundation) for modern UI
</details>
## 🗑️ Uninstallation
The utility can be uninstalled in several ways depending on how you installed it:
- **If you installed using the installer**: Use the standard Windows uninstaller
- Go to "Settings > Apps > Installed apps"
- Find "Explorer Tab Utility" and click "Uninstall"
- Or use Control Panel > Programs and Features
- Or run the uninstaller directly from the installation directory
- **If you installed via winget**:
```powershell
winget uninstall w4po.ExplorerTabUtility
```
- **If you installed via Chocolatey**:
```powershell
choco uninstall explorertabutility
```
- **If you used the portable version**: Simply delete the application folder
- If you enabled the `Add to startup` option, make sure to disable it first before deletion
## Antivirus Detection
> [!WARNING]
> The utility might be flagged by antivirus software as suspicious. This is a **false positive** caused by our use of:
> - COM interactions (for File Explorer tab management)
> - Low-level keyboard & mouse hooks (for hotkey support)
>
> The tool is completely open source, and you can:
> - Review the source code in this repository
> - Build it yourself using Visual Studio
> - Verify its safety and functionality
### Adding to Windows Defender Exclusions
If Windows Defender is blocking the utility, you can add it to the exclusions list:
1. Open Windows Security
2. Go to `Virus & threat protection`
3. Click `Manage settings` under `Virus & threat protection settings`
4. Scroll down to `Exclusions` and click `Add or remove exclusions`
5. Click `Add an exclusion` and select `Folder`
6. Browse to the Explorer Tab Utility folder location
Alternatively, you can use PowerShell (Run as Administrator):
```powershell
Add-MpPreference -ExclusionPath "PATH_TO_UTILITY_FOLDER"
```
## ℹ️ Notes
> [!NOTE]
> While this utility is optimized for best performance, some operations might experience delays due to limitations in Windows File Explorer itself:
> - The File Explorer's tab interface lacks proper APIs for programmatic control
> - Some operations in File Explorer are inherently laggy, especially with multiple simultaneous window operations
> - Windows Shell doesn't expose all the necessary functionality for seamless tab management
Despite these Windows limitations, the utility implements the best possible solutions using available Windows APIs and COM interfaces.
## 💝 Support the Project
If you find Explorer Tab Utility helpful, consider supporting its development:
<p align="center">
<a href="https://github.com/sponsors/w4po">
<img src="https://img.shields.io/badge/sponsor-30363D?style=for-the-badge&logo=GitHub-Sponsors&logoColor=#white" alt="GitHub Sponsors"/>
</a>
<a href="https://www.patreon.com/w4po">
<img src="https://img.shields.io/badge/Patreon-F96854?style=for-the-badge&logo=patreon&logoColor=white" alt="Patreon"/>
</a>
<a href="https://www.buymeacoffee.com/w4po">
<img src="https://img.shields.io/badge/Buy_Me_A_Coffee-FFDD00?style=for-the-badge&logo=buy-me-a-coffee&logoColor=black" alt="Buy Me A Coffee"/>
</a>
<a href="https://paypal.me/w4po77">
<img src="https://img.shields.io/badge/PayPal-00457C?style=for-the-badge&logo=paypal&logoColor=white" alt="PayPal"/>
</a>
</p>
Your support helps maintain and improve the project! ❤️
### Sponsors & Supporters
Thank you to all the amazing people who support this project!
<p align="center">
<a href="https://github.com/sponsors/w4po">
<img src="https://cdn.jsdelivr.net/gh/w4po/sponsors/sponsors.svg" alt="Sponsors" />
</a>
</p>
## Contributing
Contributions are welcome! Feel free to submit issues and pull requests.
## License
This project is licensed under the MIT License - see the [LICENSE](LICENSE) file for details.
## Acknowledgements
This project makes use of the following excellent open-source packages:
<p align="center">
<a href="https://github.com/HavenDV/H.Hooks">
<img src="https://img.shields.io/badge/H.Hooks-Keyboard%20Hook-purple?style=for-the-badge" alt="H.Hooks"/>
</a>
<a href="https://github.com/hardcodet/wpf-notifyicon">
<img src="https://img.shields.io/badge/Hardcodet.NotifyIcon.Wpf-System%20Tray-blue?style=for-the-badge" alt="Hardcodet NotifyIcon"/>
</a>
</p>
- **[H.Hooks](https://github.com/HavenDV/H.Hooks)** - Efficient and reliable keyboard hook implementation
- **[Hardcodet.NotifyIcon.Wpf](https://github.com/hardcodet/wpf-notifyicon)** - Modern WPF-based system tray icon implementation
Special thanks to the maintainers of these packages for their excellent work!
## Code Signing
<table>
<tbody>
<tr>
<td align="center"><img alt="[SignPath]" src="https://avatars.githubusercontent.com/u/34448643" height="30"/></td>
<td>Free code signing provided by <a href="https://signpath.io?utm_source=foundation&utm_medium=github&utm_campaign=ExplorerTabUtility">SignPath.io</a>, certificate by <a href="https://signpath.org?utm_source=foundation&utm_medium=github&utm_campaign=ExplorerTabUtility">SignPath Foundation</a></td>
</tr>
</tbody>
</table>
", Assign "at most 3 tags" to the expected json: {"id":"12933","tags":[]} "only from the tags list I provide: [{"id":77,"name":"3d"},{"id":89,"name":"agent"},{"id":17,"name":"ai"},{"id":54,"name":"algorithm"},{"id":24,"name":"api"},{"id":44,"name":"authentication"},{"id":3,"name":"aws"},{"id":27,"name":"backend"},{"id":60,"name":"benchmark"},{"id":72,"name":"best-practices"},{"id":39,"name":"bitcoin"},{"id":37,"name":"blockchain"},{"id":1,"name":"blog"},{"id":45,"name":"bundler"},{"id":58,"name":"cache"},{"id":21,"name":"chat"},{"id":49,"name":"cicd"},{"id":4,"name":"cli"},{"id":64,"name":"cloud-native"},{"id":48,"name":"cms"},{"id":61,"name":"compiler"},{"id":68,"name":"containerization"},{"id":92,"name":"crm"},{"id":34,"name":"data"},{"id":47,"name":"database"},{"id":8,"name":"declarative-gui "},{"id":9,"name":"deploy-tool"},{"id":53,"name":"desktop-app"},{"id":6,"name":"dev-exp-lib"},{"id":59,"name":"dev-tool"},{"id":13,"name":"ecommerce"},{"id":26,"name":"editor"},{"id":66,"name":"emulator"},{"id":62,"name":"filesystem"},{"id":80,"name":"finance"},{"id":15,"name":"firmware"},{"id":73,"name":"for-fun"},{"id":2,"name":"framework"},{"id":11,"name":"frontend"},{"id":22,"name":"game"},{"id":81,"name":"game-engine "},{"id":23,"name":"graphql"},{"id":84,"name":"gui"},{"id":91,"name":"http"},{"id":5,"name":"http-client"},{"id":51,"name":"iac"},{"id":30,"name":"ide"},{"id":78,"name":"iot"},{"id":40,"name":"json"},{"id":83,"name":"julian"},{"id":38,"name":"k8s"},{"id":31,"name":"language"},{"id":10,"name":"learning-resource"},{"id":33,"name":"lib"},{"id":41,"name":"linter"},{"id":28,"name":"lms"},{"id":16,"name":"logging"},{"id":76,"name":"low-code"},{"id":90,"name":"message-queue"},{"id":42,"name":"mobile-app"},{"id":18,"name":"monitoring"},{"id":36,"name":"networking"},{"id":7,"name":"node-version"},{"id":55,"name":"nosql"},{"id":57,"name":"observability"},{"id":46,"name":"orm"},{"id":52,"name":"os"},{"id":14,"name":"parser"},{"id":74,"name":"react"},{"id":82,"name":"real-time"},{"id":56,"name":"robot"},{"id":65,"name":"runtime"},{"id":32,"name":"sdk"},{"id":71,"name":"search"},{"id":63,"name":"secrets"},{"id":25,"name":"security"},{"id":85,"name":"server"},{"id":86,"name":"serverless"},{"id":70,"name":"storage"},{"id":75,"name":"system-design"},{"id":79,"name":"terminal"},{"id":29,"name":"testing"},{"id":12,"name":"ui"},{"id":50,"name":"ux"},{"id":88,"name":"video"},{"id":20,"name":"web-app"},{"id":35,"name":"web-server"},{"id":43,"name":"webassembly"},{"id":69,"name":"workflow"},{"id":87,"name":"yaml"}]" returns me the "expected json"