base on The Librum client application # Librum
Librum is an application designed to make reading <b>enjoyable</b> and <b>straightforward</b> for everyone.
It's not **just** an e-book reader. With Librum, you can manage your own online library and access it from any device anytime, anywhere. It has features like note-taking, AI tooling, and highlighting, while offering customization to make it as personal as you want!
Librum also provides free access to over 70,000 books and personal reading statistics while being free and completely open source.
<br>
Download Librum from [our website](https://librumreader.com)!
<br>
# Table of Contents
- [Preview](#Preview)
- [Contributing](#Contributing)
- [Contact](#Contact)
- [Donations](#Donations)
- [Translations](#Translations)
- [Documentation](#Documentation)
- [Self-hosting](#Self-hosting)
- [Details](#Details)
- [Build Guide](#Build-Guide)
<br>
# Preview
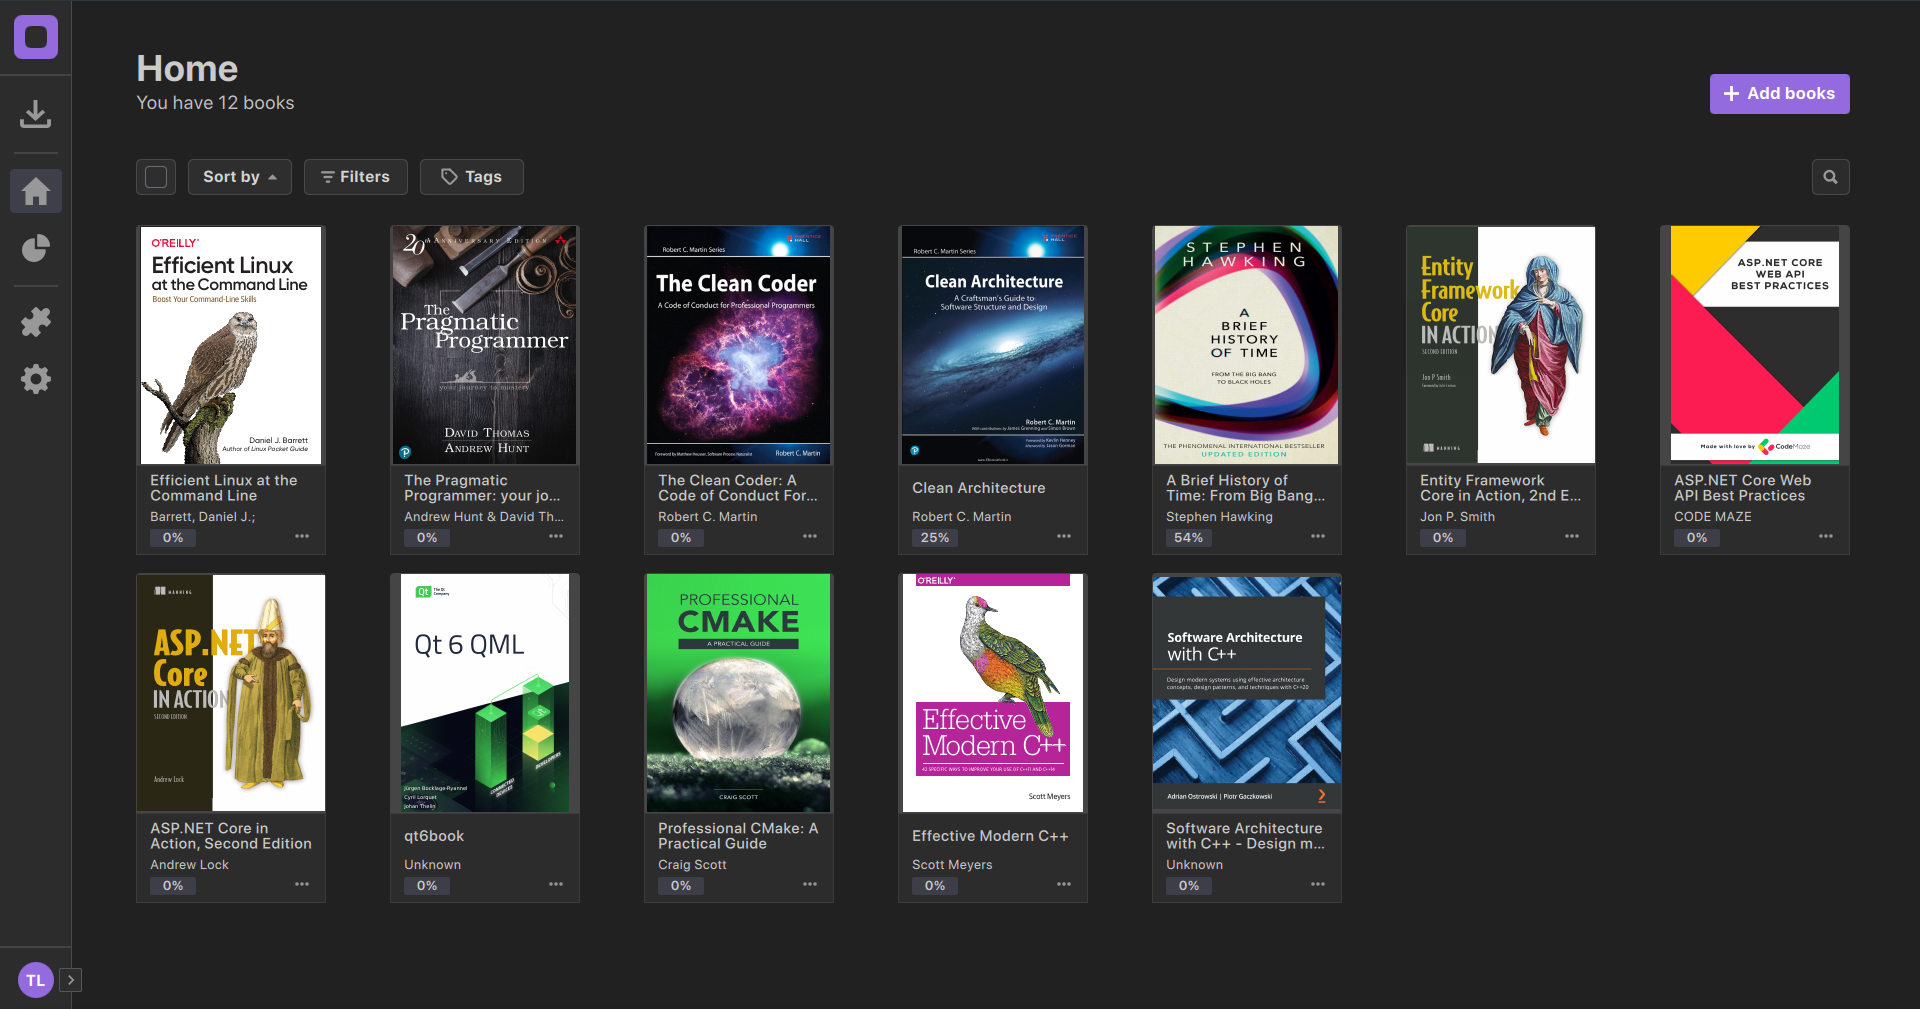
Setup and manage your own online library

<br>
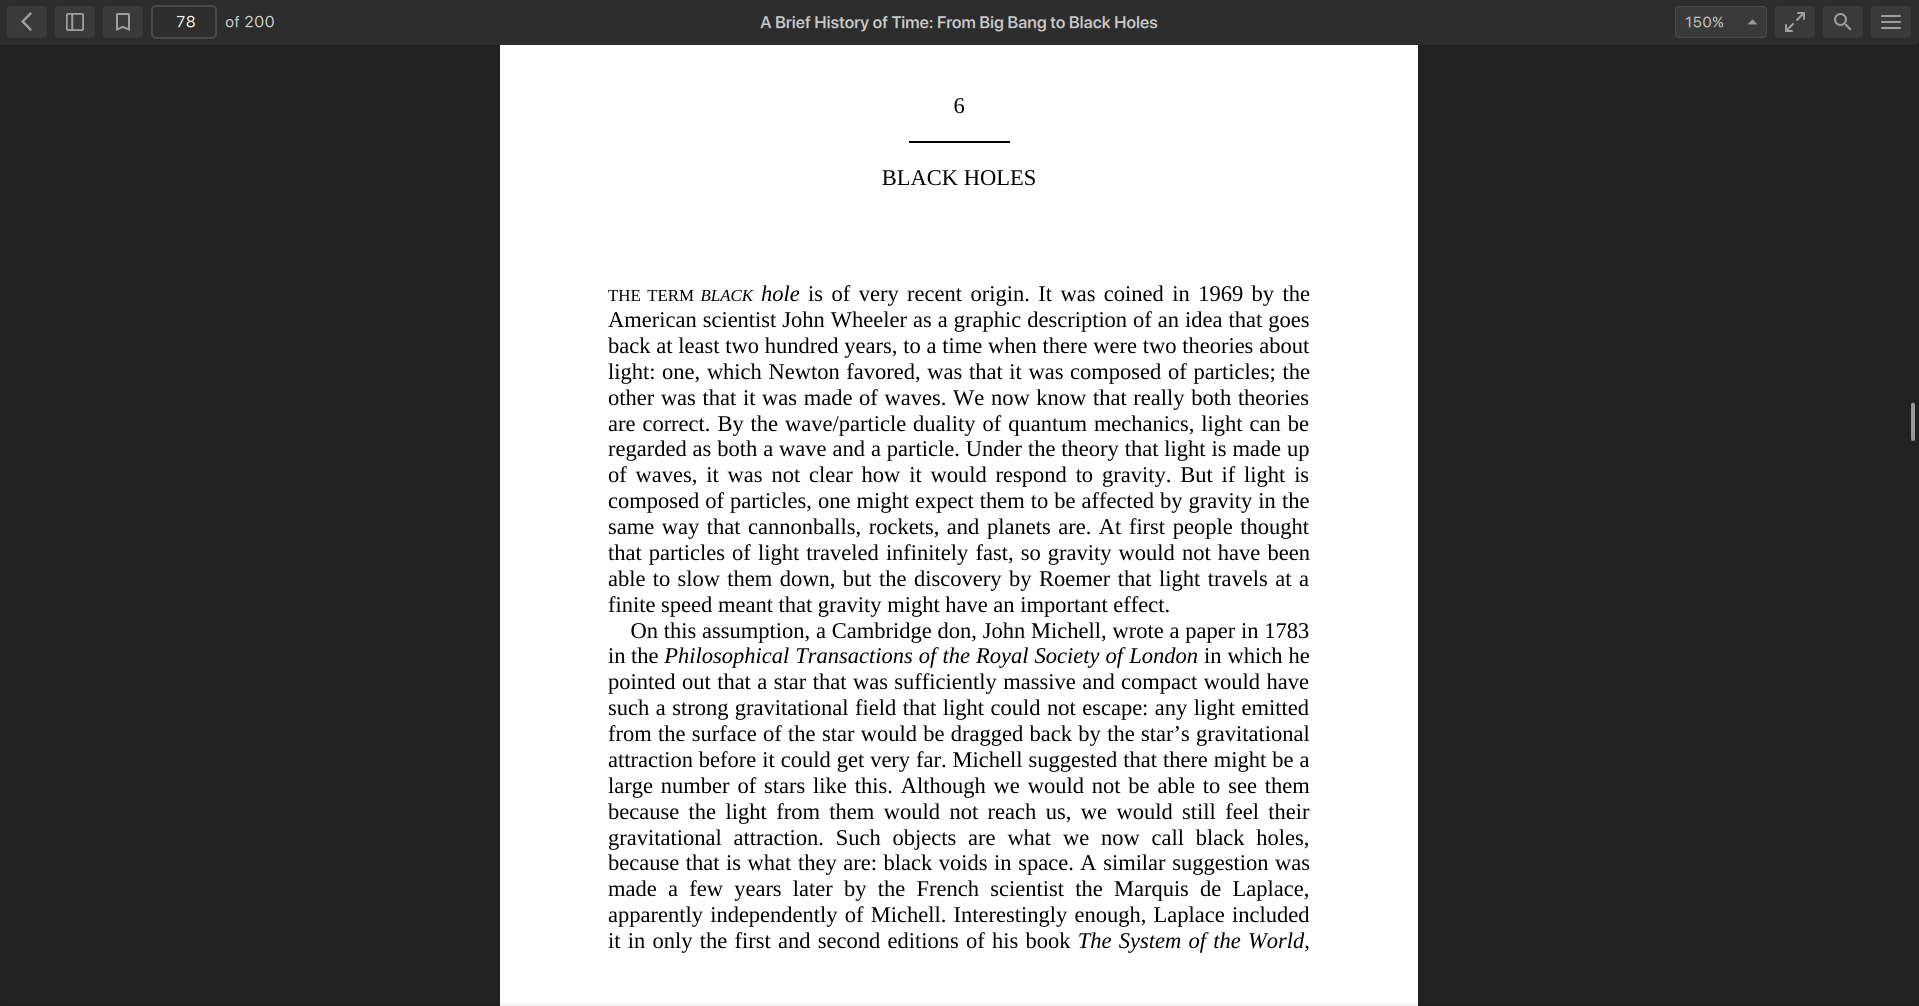
A simple and modern interface

<br>
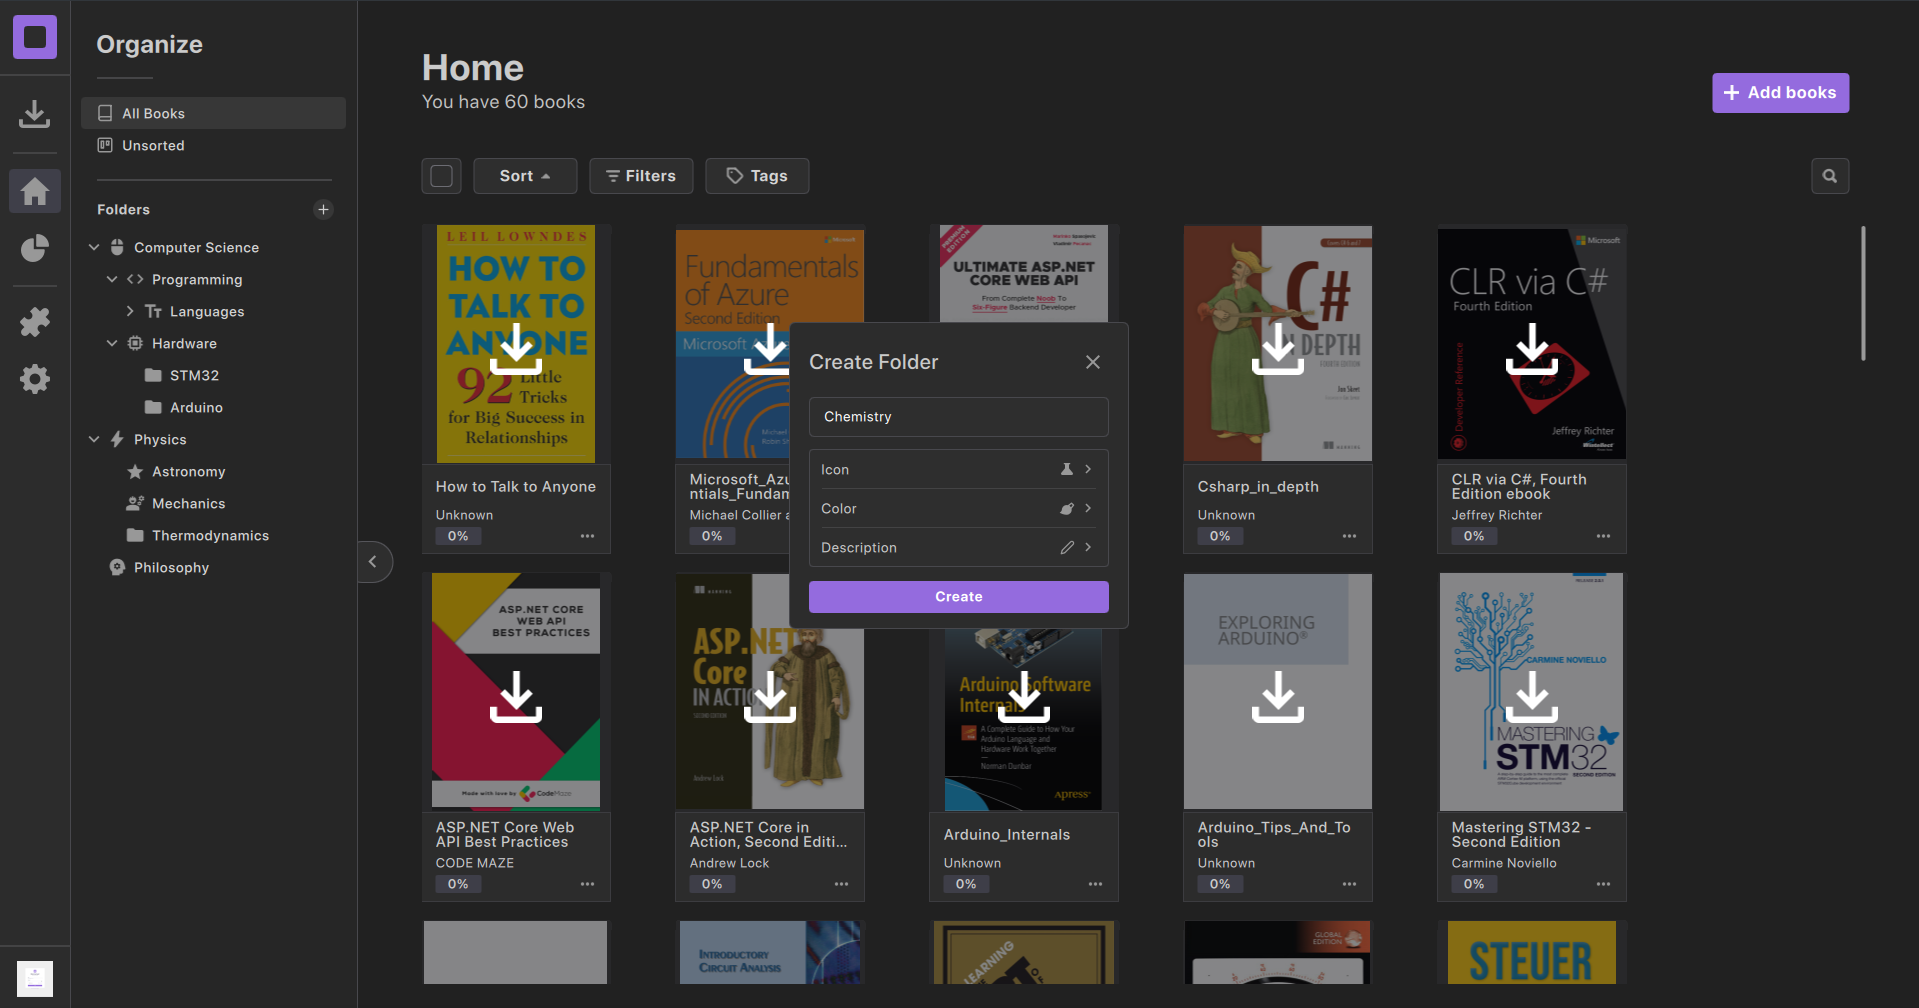
Add your books to collections, tag them, and sort them in any way you want

<br>
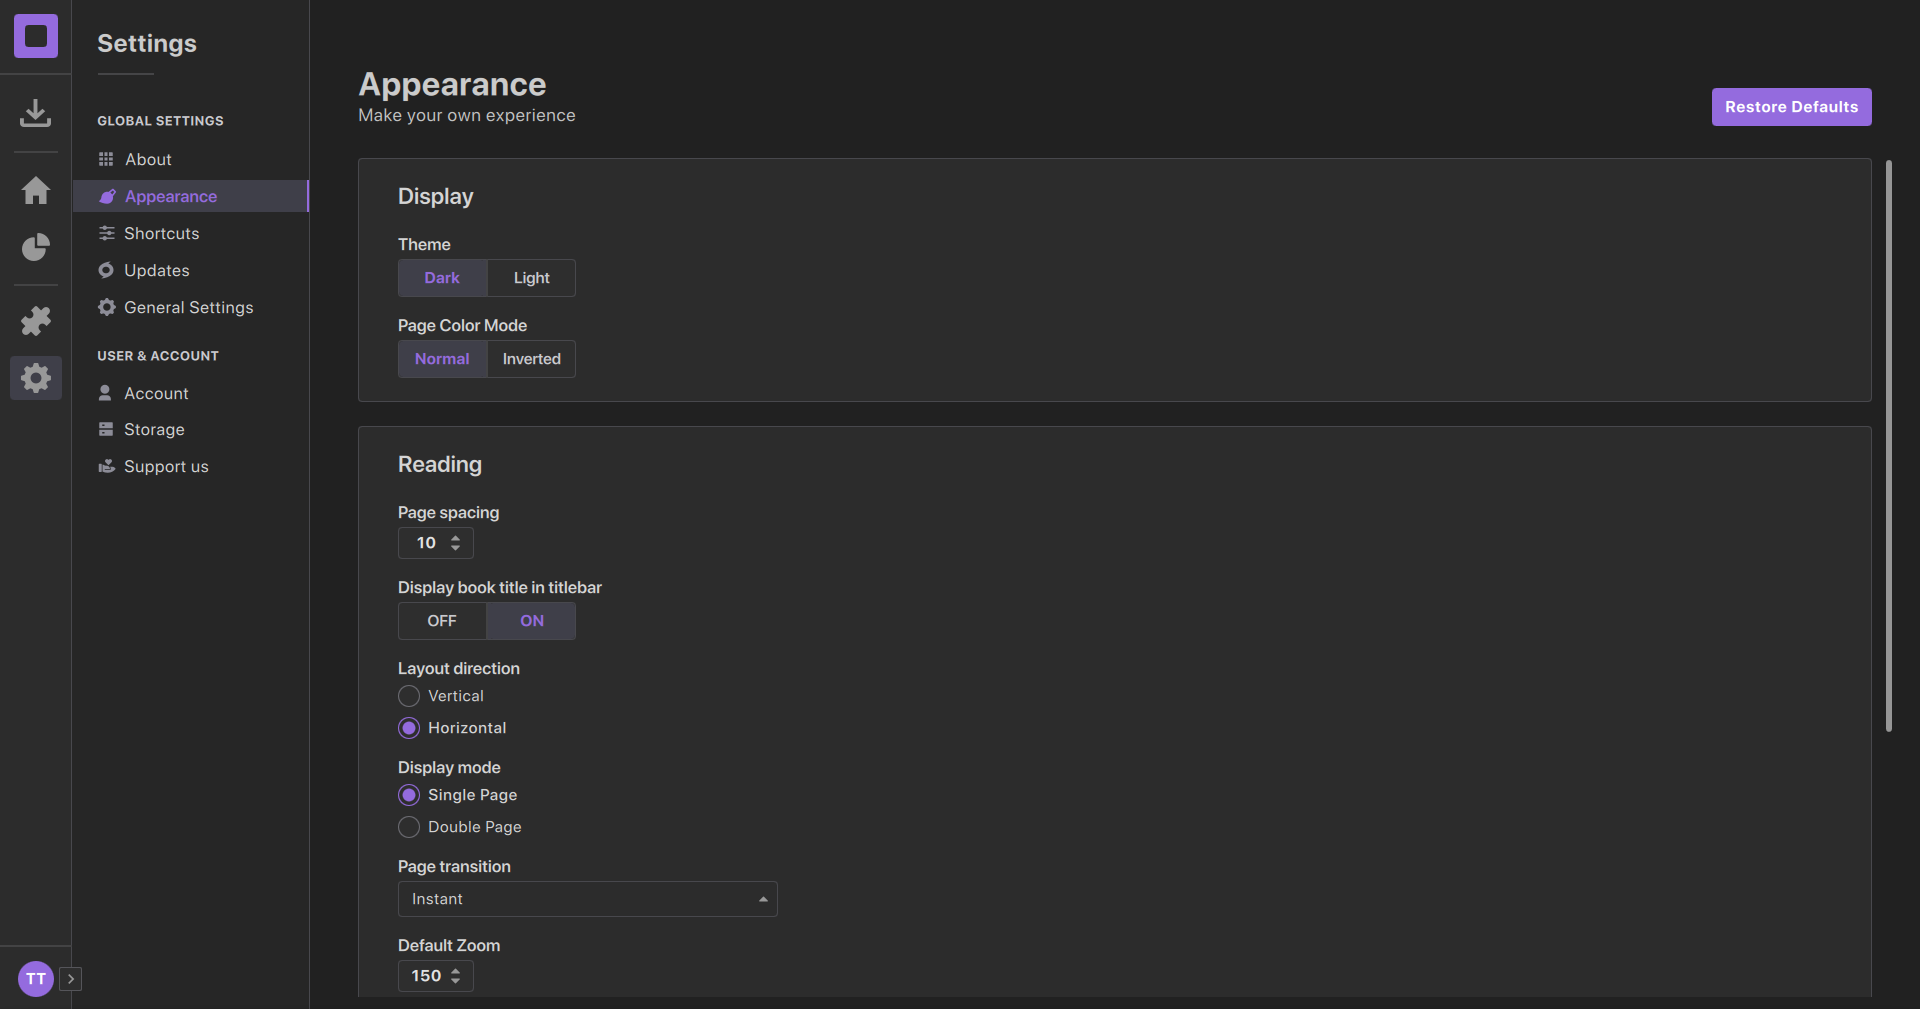
Customize Librum to make it personal to you

<br>
# Contributing
If you'd to support Librum's development, check out: https://librumreader.com/contribute
<br>
<br>
All of the current feature requests, bugs and tasks are listed in the [issues](https://github.com/Librum-Reader/Librum/issues). Easy tasks are labeled "good first issue", so that is a good starting point.
<br>
<br>
PS: Feel free to tag me (@DavidLazarescu) in the comments of any issue if you have questions.
<br>
# Contact
For questions, you can reach us under:
[email protected]
<br>
For business related contact, reach out to us here:
[email protected]
<br>
# Donations
Donations make it possible for us to cover our server costs and allow us to make investments into new areas of development.
<br>
If you would like to support us, check out: https://librumreader.com/contribute/donate or become a Github sponsor!
<br>
<br>
As a team of opensource developers we rely on donations to continue working on projects like Librum. Your help is greatly appreciated.
<br>
# Translations
Librum is currently available in the languages listed [here](https://github.com/Librum-Reader/Librum/tree/main/src/presentation/translations)
If you want to translate Librum to another language, follow the steps below:
- Download [this file](https://github.com/Librum-Reader/Librum/blob/dev/develop/src/presentation/translations/librum_en.ts)
- Rename the file to contain your language's suffix, e.g. "librum_ru.ts" for Russian or "librum_de.ts" for German
- Download the translation software (Qt Linguist) either for Windows from [here](https://github.com/thurask/Qt-Linguist) or using the [Qt Installer](https://www.qt.io/download-open-source)
- Now start Qt Linguist, open the downloaded file, set the target language to the language you want to translate to and start translating.
(Check out [this guide](https://youtu.be/xNIz78IPBu0?t=347) for a quick overview of Qt Linguist)
Once you are done, create a pull request or open up an issue with your new translation file!<br>
If you run into any problems, need guidance or have questions, feel free to reach out to us at:
[email protected]
<br>
Notes:
- Make sure that your translations are approximately the same length as the original text
- Please carefully check for spelling mistakes (including punctuation and capitalization)
<br>
# Documentation
For documentation go to [Librum's GitHub-wiki](https://github.com/Librum-Reader/Librum/wiki)
<br>
# Self-hosting
To self-host Librum you need to run [Librum-Server](https://github.com/Librum-Reader/Librum-Server) locally (instructions can be found [here](https://github.com/Librum-Reader/Librum-Server#self-hosting)) and tell the client to use your self-hosted server by:
- (Linux) Editing ~/.config/Librum-Reader/Librum.conf and setting `selfHosted=true` and `serverHost` to your server's url (e.g. `serverHost=https://127.0.0.1:5001`)
- (Windows) Opening the registry editor (Press `Win + R` and search for `regedit`), navigating to `HKEY_CURRENT_USER\Software\Librum-Reader\Librum` and setting `selfHosted=true` and `serverHost` to your server's url
Make sure to run the application before following the steps above, to generate the required files.
<br>
# Details
### Supported platforms
Part of Librum's aim is to work on **any** platform. No matter where you are or which device you use, you can always continue your book with Librum, as it is <b>cross platform</b>.<br>
We support:
- Windows
- GNU/Linux
- MacOS
- IOS (Coming Soon)
- Android (Coming Soon)
<br>
### Supported formats
Librum is the best choice for all kinds of books, since Librum supports <b>all</b> major book formats<br>
including:
- PDF
- EPUB
- CBZ (Comic books)
- FB2
- TIFF
- Mobi
- XPS
- Images
And many more!
<br>
### Features
Librum's objective is to make your reading more <b>productive</b>; to that end, we provide you with a variety of features that you can access via a <b>simple</b> and <b>straightforward</b> interface.<br>
These features include:
- A modern e-reader
- A personalized and customizable online library
- Book meta-data editing
- A free in-app bookstore with more than 70,000 books
- Book syncing across all of your devices
- Highlighting
- Bookmarking
- Text search
- Unlimited customization
- Fine-grained organization through Librum's folder system
- Note-taking (Coming Soon)
- TTS (Coming Soon)
- Personalized reading statistics (Coming Soon)
Want a new feature? Feel free to leave a feature request ticket!
<br><br>
# Build Guide
Follow this guide to build Librum from source.
<br>
## For GNU/Linux
### Prerequisites
- cmake (https://cmake.org/download)
- make (http://ftp.gnu.org/gnu/make)
- g++ (https://gcc.gnu.org)
- python3-venv (on ubuntu use `sudo apt install python3-venv`)
- Qt 6.5 (https://www.qt.io/download-open-source)
### Installation
The installation is straight forward, just follow the steps below:
<br>
1. Clone the repository.
```sh
git clone https://github.com/Librum-Reader/Librum.git --recursive
```
2. Step into the cloned project folder.
```sh
cd Librum
```
3. Create the build folder and step into it.
```sh
mkdir build-Release
cd build-Release
```
4. Run cmake.
```sh
cmake -DCMAKE_INSTALL_PREFIX=/usr -DCMAKE_BUILD_TYPE=Release -DBUILD_TESTS=Off -DCMAKE_PREFIX_PATH=<path/to/Qt> ..
```
Set `CMAKE_PREFIX_PATH` to your Qt installation path. Installing Qt via the online installer usually installs it to `/home/<name>/Qt/<version>/gcc_64`
6. Build the project
```sh
cmake --build . -j $(nproc)
```
7. Install Librum
```sh
cmake --install .
```
<br>
### Troubleshooting
Here are solutions to some common errors. If your error is not listed here, please open an issue.
<br>
- Error: `Failed to find required Qt component "Quick".`<br>
- Solution: Install the libGL mesa dev package, on ubuntu its `sudo apt install libgl1-mesa-dev` and on fedora its `sudo dnf install mesa-libGL-devel`.
- Error: `Could not load the qt platform plugin "xcb" even though it was found`
- Solution: Install the libxcb-cursor-dev, on ubuntu its `sudo apt install libxcb-cursor-dev`
<br>
## For Windows
### Prerequisites
- cmake (https://cmake.org/download)
- Visual Studio <b>19</b> (https://visualstudio.microsoft.com/de/vs/older-downloads)
- Python (https://www.python.org/downloads)
- Qt 6.5 (https://www.qt.io/download-open-source)
### Installation
To build Librum on windows, run the following commands in the Powershell:
<br>
1. Clone the repository.
```sh
git clone https://github.com/Librum-Reader/Librum.git --recursive
```
2. Step into the cloned project folder.
```sh
cd Librum
```
3. Create the build folder and step into it.
```sh
mkdir build
cd build
```
4. Run cmake.
```sh
cmake -DBUILD_TESTS=Off -DCMAKE_PREFIX_PATH=<path/to/qt> ..
```
Set `CMAKE_PREFIX_PATH` to your Qt installation path. Installing Qt via the online installer usually installs it to `<Drive>\\Qt\\<version>\\msvc2019_64`
6. Build the project
```sh
cmake --build . --config Release
```
7. Run the app
```sh
./librum
```
### Additional Info
Here are some things to keep in mind during the build process.
<br>
- Make sure to add cmake and the Qt binaries to the `PATH` environment variable
- You need Visual Studio 2019, newer versions will **not** work
- For the Qt installation, you **only** need to choose "MSVC 2019 64-bit", you can untick everything else to reduce the download size
<br>
## For MacOS
### Prerequisites
- cmake (https://cmake.org/download)
- make (http://ftp.gnu.org/gnu/make)
- g++ (https://gcc.gnu.org)
- python3 (https://www.python.org/downloads)
- Qt 6.5 (https://www.qt.io/download-open-source)
### Installation
The installation is straight forward, just follow the steps below:
<br>
1. Clone the repository.
```sh
git clone https://github.com/Librum-Reader/Librum.git --recursive
```
2. Step into the cloned project folder.
```sh
cd Librum
```
3. Create the build folder and step into it.
```sh
mkdir build-Release
cd build-Release
```
4. Run cmake.
```sh
cmake -DCMAKE_INSTALL_PREFIX=/usr/local -DCMAKE_BUILD_TYPE=Release -DBUILD_TESTS=Off -DCMAKE_PREFIX_PATH=<path/to/Qt> ..
```
Set `CMAKE_PREFIX_PATH` to your Qt installation path. Installing Qt via the online installer usually installs it to `/Users/<name>/Qt/<version>/macos`
6. Build the project
```sh
cmake --build . -j $(nproc)
```
7. Install Librum
```sh
cmake --install
```
Note: Make sure to add `/usr/local/lib` to your DYLIB path, for MacOS to find the installed libraries by exporting `DYLD_LIBRARY_PATH=$DYLD_LIBRARY_PATH:/usr/local/lib`.
<br>
", Assign "at most 3 tags" to the expected json: {"id":"6145","tags":[]} "only from the tags list I provide: [{"id":77,"name":"3d"},{"id":89,"name":"agent"},{"id":17,"name":"ai"},{"id":54,"name":"algorithm"},{"id":24,"name":"api"},{"id":44,"name":"authentication"},{"id":3,"name":"aws"},{"id":27,"name":"backend"},{"id":60,"name":"benchmark"},{"id":72,"name":"best-practices"},{"id":39,"name":"bitcoin"},{"id":37,"name":"blockchain"},{"id":1,"name":"blog"},{"id":45,"name":"bundler"},{"id":58,"name":"cache"},{"id":21,"name":"chat"},{"id":49,"name":"cicd"},{"id":4,"name":"cli"},{"id":64,"name":"cloud-native"},{"id":48,"name":"cms"},{"id":61,"name":"compiler"},{"id":68,"name":"containerization"},{"id":92,"name":"crm"},{"id":34,"name":"data"},{"id":47,"name":"database"},{"id":8,"name":"declarative-gui "},{"id":9,"name":"deploy-tool"},{"id":53,"name":"desktop-app"},{"id":6,"name":"dev-exp-lib"},{"id":59,"name":"dev-tool"},{"id":13,"name":"ecommerce"},{"id":26,"name":"editor"},{"id":66,"name":"emulator"},{"id":62,"name":"filesystem"},{"id":80,"name":"finance"},{"id":15,"name":"firmware"},{"id":73,"name":"for-fun"},{"id":2,"name":"framework"},{"id":11,"name":"frontend"},{"id":22,"name":"game"},{"id":81,"name":"game-engine "},{"id":23,"name":"graphql"},{"id":84,"name":"gui"},{"id":91,"name":"http"},{"id":5,"name":"http-client"},{"id":51,"name":"iac"},{"id":30,"name":"ide"},{"id":78,"name":"iot"},{"id":40,"name":"json"},{"id":83,"name":"julian"},{"id":38,"name":"k8s"},{"id":31,"name":"language"},{"id":10,"name":"learning-resource"},{"id":33,"name":"lib"},{"id":41,"name":"linter"},{"id":28,"name":"lms"},{"id":16,"name":"logging"},{"id":76,"name":"low-code"},{"id":90,"name":"message-queue"},{"id":42,"name":"mobile-app"},{"id":18,"name":"monitoring"},{"id":36,"name":"networking"},{"id":7,"name":"node-version"},{"id":55,"name":"nosql"},{"id":57,"name":"observability"},{"id":46,"name":"orm"},{"id":52,"name":"os"},{"id":14,"name":"parser"},{"id":74,"name":"react"},{"id":82,"name":"real-time"},{"id":56,"name":"robot"},{"id":65,"name":"runtime"},{"id":32,"name":"sdk"},{"id":71,"name":"search"},{"id":63,"name":"secrets"},{"id":25,"name":"security"},{"id":85,"name":"server"},{"id":86,"name":"serverless"},{"id":70,"name":"storage"},{"id":75,"name":"system-design"},{"id":79,"name":"terminal"},{"id":29,"name":"testing"},{"id":12,"name":"ui"},{"id":50,"name":"ux"},{"id":88,"name":"video"},{"id":20,"name":"web-app"},{"id":35,"name":"web-server"},{"id":43,"name":"webassembly"},{"id":69,"name":"workflow"},{"id":87,"name":"yaml"}]" returns me the "expected json"