base on The free and privacy-friendly screen recorder with no limits 🎥 # Screenity
[](https://screenity.io)
The free and privacy-friendly screen recorder with no limits 🎥
[Get it now - it's free!](https://chrome.google.com/webstore/detail/screenity-screen-recorder/kbbdabhdfibnancpjfhlkhafgdilcnji)
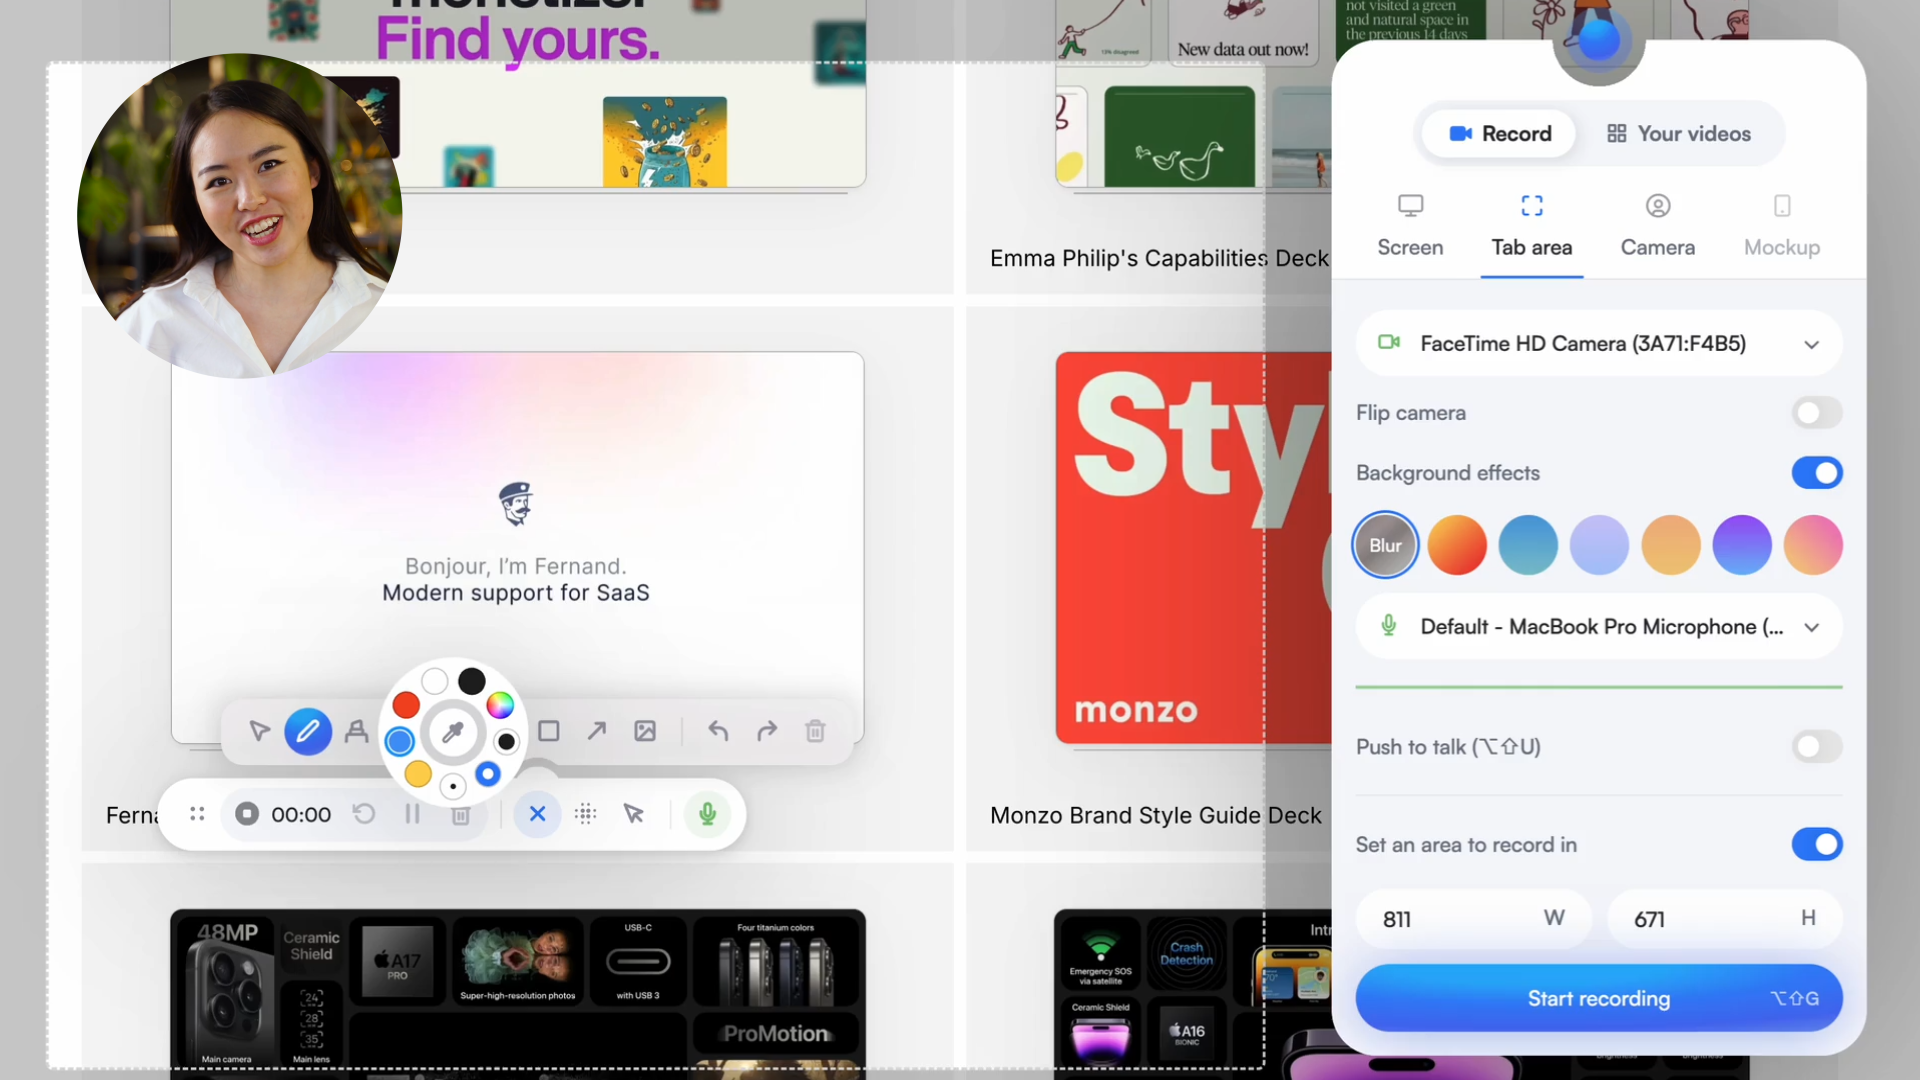
Screenity is a powerful privacy-friendly screen recorder and annotation tool to make better videos for work, education, and more. You can create stunning product demos, tutorials, presentations, or share feedback with your team - all for free.
> You can support this project (and many others) through [GitHub Sponsors](https://github.com/sponsors/alyssaxuu)! ❤️
Made by [Alyssa X](https://alyssax.com)
<a href="https://www.producthunt.com/posts/screenity?utm_source=badge-top-post-badge&utm_medium=badge&utm_souce=badge-screenity" target="_blank"><img src="https://api.producthunt.com/widgets/embed-image/v1/top-post-badge.svg?post_id=275308&theme=light&period=daily" alt="Screenity - The most powerful screen recorder for Chrome | Product Hunt" style="width: 250px; height: 54px;" width="250" height="54" /></a>
<a href="https://news.ycombinator.com/item?id=25150804" target="_blank"><img height=53 src="https://hackerbadge.now.sh/api?id=25150804&type=orange" alt="Featured on HackerNews"></a>
> ❗️ Screenity has been rebuilt from the ground up, and updated to MV3. [Click here](https://help.screenity.io/getting-started/77KizPC8MHVGfpKpqdux9D/what%E2%80%99s-changed-in-the-new-version-of-screenity/bDtvcwAtw9PPesQeNH4zjE) to here to learn more about why, and what's changed in the new version. Also note that **the license has changed to [GPLv3](https://github.com/alyssaxuu/screenity/blob/master/LICENSE)**, but the older MV2 version remains MIT licensed. Make sure you read the license and the [Terms of Service](https://screenity.io/en/terms/) regarding intellectual property.
## Table of contents
- [Features](#features)
- [Self-hosting Screenity](#self-hosting-screenity)
- [Creating a development version](#creating-a-development-version)
- [Enabling Save to Google Drive](#enabling-save-to-google-drive)
- [Acknowledgements](#acknowledgements)
## Features
🎥 Make unlimited recordings of your tab, a specific area, desktop, any application, or camera<br>
🎙️ Record your microphone or internal audio, and use features like push to talk<br>
✏️ Annotate by drawing anywhere on the screen, adding text, arrows, shapes, and more<br>
✨ Use AI-powered camera backgrounds or blur to enhance your recordings<br>
🔎 Zoom in smoothly in your recordings to focus on specific areas<br>
🪄 Blur out any sensitive content of any page to keep it private<br>
✂️ Remove or add audio, cut, trim, or crop your recordings with a comprehensive editor<br>
👀 Highlight your clicks and cursor, and go in spotlight mode<br>
⏱️ Set up alarms to automatically stop your recording<br>
💾 Export as mp4, gif, and webm, or save the video directly to Google Drive to share a link<br>
⚙️ Set a countdown, hide parts of the UI, or move it anywhere<br>
🔒 Only you can see your videos, we don’t collect any of your data. You can even go offline!<br>
💙 No limits, make as many videos as you want, for as long as you want<br> …and much more - all for free & no sign in needed!
## Self-hosting Screenity
You can run Screenity locally without having to install it from the Chrome Store. Here's how:
1. Download the latest Build.zip from the [releases page](https://github.com/alyssaxuu/screenity/releases)
2. Load the extension by pasting `chrome://extensions/` in the address bar, and [enabling developer mode](https://developer.chrome.com/docs/extensions/mv2/faq/#:~:text=You%20can%20start%20by%20turning,a%20packaged%20extension%2C%20and%20more.).
3. Drag the folder that contains the code (make sure it's a folder and not a ZIP file, so unzip first), or click on the "Load unpacked" button and locate the folder.
4. That's it, you should now be able to use Screenity locally. [Follow these instructions](#enabling-save-to-google-drive) to set up the Google Drive integration.
## Creating a development version
> ❗️ Note that the license has changed to [GPLv3](https://github.com/alyssaxuu/screenity/blob/master/LICENSE) for the current MV3 version (Screenity version 3.0.0 and higher). Make sure to read the license and the [Terms of Service](https://screenity.io/en/terms/) regarding intellectual property.
1. Check if your [Node.js](https://nodejs.org/) version is >= **14**.
2. Clone this repository.
3. Run `npm install` to install the dependencies.
4. Run `npm start`.
5. Load the extension by going to `chrome://extensions/` , and [enabling developer mode](https://developer.chrome.com/docs/extensions/mv2/faq/#:~:text=You%20can%20start%20by%20turning,a%20packaged%20extension%2C%20and%20more.).
6. Click on `Load unpacked extension`.
7. Select the `build` folder.
### Enabling Save to Google Drive
To enable the Google Drive Upload (authorization consent screen) you must change the client_id in the manifest.json file with your linked extension key.
You can create it accessing [Google Cloud Console](https://console.cloud.google.com/apis/credentials) and selecting Create Credential > OAuth Client ID > Chrome App. To create a persistent extension key, you can follow the steps detailed [here](https://developer.chrome.com/docs/extensions/reference/manifest/key).
## Libraries used
- [FFmpeg WASM](https://ffmpegwasm.netlify.app/) for editing and encoding videos
- [Tensorflow](https://github.com/tensorflow/tfjs) with the [Selfie Segmentation](https://blog.tensorflow.org/2022/01/body-segmentation.html) model
- [Fabric.js](https://github.com/fabricjs/fabric.js) for drawing and annotating
- [Radix Primitives](https://www.radix-ui.com/primitives) for the UI components
- [react-color](https://uiwjs.github.io/react-color/) for the color wheel
- [localForage](https://github.com/localForage/localForage) to help store videos offline with IndexedDB
- [Wavesurfer.js](https://wavesurfer.xyz/) to create audio waveforms in the popup and the editor
- [React Advanced Cropper](https://advanced-cropper.github.io/react-advanced-cropper/) for the cropping UI in the editor
- [fix-webm-duration](https://github.com/yusitnikov/fix-webm-duration) to add missing metadata to WEBM files
## Acknowledgements
- Thanks to [HelpKit](https://www.helpkit.so/) for sponsoring this project by hosting the [Screenity Help Center](https://help.screenity.io/).
- Thanks to [Mei Xuan](https://www.behance.net/meixuanloo) for helping with the Chinese translation of the extension.
If you need any help, or want to become a Screenity expert, you can browse articles and guides in the [help center](https://help.screenity.io). You can also submit any feedback or ideas in this [form](https://tally.so/r/3ElpXq), or contact through [this page](https://help.screenity.io/contact)
Feel free to reach out to me through email at
[email protected] or [on Twitter](https://twitter.com/alyssaxuu) if you have any questions or feedback! Hope you find this useful 💜
", Assign "at most 3 tags" to the expected json: {"id":"6879","tags":[]} "only from the tags list I provide: [{"id":77,"name":"3d"},{"id":89,"name":"agent"},{"id":17,"name":"ai"},{"id":54,"name":"algorithm"},{"id":24,"name":"api"},{"id":44,"name":"authentication"},{"id":3,"name":"aws"},{"id":27,"name":"backend"},{"id":60,"name":"benchmark"},{"id":72,"name":"best-practices"},{"id":39,"name":"bitcoin"},{"id":37,"name":"blockchain"},{"id":1,"name":"blog"},{"id":45,"name":"bundler"},{"id":58,"name":"cache"},{"id":21,"name":"chat"},{"id":49,"name":"cicd"},{"id":4,"name":"cli"},{"id":64,"name":"cloud-native"},{"id":48,"name":"cms"},{"id":61,"name":"compiler"},{"id":68,"name":"containerization"},{"id":92,"name":"crm"},{"id":34,"name":"data"},{"id":47,"name":"database"},{"id":8,"name":"declarative-gui "},{"id":9,"name":"deploy-tool"},{"id":53,"name":"desktop-app"},{"id":6,"name":"dev-exp-lib"},{"id":59,"name":"dev-tool"},{"id":13,"name":"ecommerce"},{"id":26,"name":"editor"},{"id":66,"name":"emulator"},{"id":62,"name":"filesystem"},{"id":80,"name":"finance"},{"id":15,"name":"firmware"},{"id":73,"name":"for-fun"},{"id":2,"name":"framework"},{"id":11,"name":"frontend"},{"id":22,"name":"game"},{"id":81,"name":"game-engine "},{"id":23,"name":"graphql"},{"id":84,"name":"gui"},{"id":91,"name":"http"},{"id":5,"name":"http-client"},{"id":51,"name":"iac"},{"id":30,"name":"ide"},{"id":78,"name":"iot"},{"id":40,"name":"json"},{"id":83,"name":"julian"},{"id":38,"name":"k8s"},{"id":31,"name":"language"},{"id":10,"name":"learning-resource"},{"id":33,"name":"lib"},{"id":41,"name":"linter"},{"id":28,"name":"lms"},{"id":16,"name":"logging"},{"id":76,"name":"low-code"},{"id":90,"name":"message-queue"},{"id":42,"name":"mobile-app"},{"id":18,"name":"monitoring"},{"id":36,"name":"networking"},{"id":7,"name":"node-version"},{"id":55,"name":"nosql"},{"id":57,"name":"observability"},{"id":46,"name":"orm"},{"id":52,"name":"os"},{"id":14,"name":"parser"},{"id":74,"name":"react"},{"id":82,"name":"real-time"},{"id":56,"name":"robot"},{"id":65,"name":"runtime"},{"id":32,"name":"sdk"},{"id":71,"name":"search"},{"id":63,"name":"secrets"},{"id":25,"name":"security"},{"id":85,"name":"server"},{"id":86,"name":"serverless"},{"id":70,"name":"storage"},{"id":75,"name":"system-design"},{"id":79,"name":"terminal"},{"id":29,"name":"testing"},{"id":12,"name":"ui"},{"id":50,"name":"ux"},{"id":88,"name":"video"},{"id":20,"name":"web-app"},{"id":35,"name":"web-server"},{"id":43,"name":"webassembly"},{"id":69,"name":"workflow"},{"id":87,"name":"yaml"}]" returns me the "expected json"