base on A CMS like modular starter application project built with Laravel 12.x. and Livewire <p align="center"><img src="https://user-images.githubusercontent.com/396987/82162573-6940f500-98c7-11ea-974e-888b4f866c74.jpg" alt="Laravel Starter - A CMS like modular starter project built with the latest Laravel framework."></p>
# Laravel Starter (based on Laravel 12.x)
**Laravel Starter** is a Laravel 12.x based simple starter project. Most of the commonly needed features of an application like `Authentication`, `Authorisation`, `Users` and `Role management`, `Application Backend`, `Backup`, `Log viewer` are available here. It is modular, so you may use this project as a base and build your own modules. A module can be used in any `Laravel Starter` based project.
Here Frontend and Backend are completely separated with separate routes, controllers, and themes as well.
***Please let me know your feedback and comments.***
[](https://packagist.org/packages/nasirkhan/laravel-starter) [](https://packagist.org/packages/nasirkhan/laravel-starter) [](https://packagist.org/packages/nasirkhan/laravel-starter) [](https://packagist.org/packages/nasirkhan/laravel-starter)
# Reporting a Vulnerability
If you discover any security-related issues, please send an e-mail to Nasir Khan Saikat via
[email protected] instead of using the issue tracker.
# Appplication Demo
Check the following demo project. It is just a straight installation of the project without any modification.
Demo URL: https://laravel.nasirkhn.com
You may use the following account credentials to access the application backend.
```
User:
[email protected]
Pass: secret
User:
[email protected]
Pass: secret
```
# Custom Commands
We have created a number of custom commands for the project. The commands are listed below with a brief about their use of it.
## Install / Setup
Run the interactive setup wizard for a fresh project. It copies `.env`, generates an app key, configures the database, runs migrations, seeds data, creates the storage link, and builds frontend assets.
```bash
php artisan starter:install
```
Use `--skip-npm` to skip the frontend build, `--demo` to seed demo data without prompting, or `--skip-db` if the database is already set up.
## Update
After pulling changes from the repository, run:
```bash
php artisan starter:update
```
This runs `composer update`, checks for new module migrations, runs outstanding migrations, and clears all caches.
## Create New module
To create a project use the following command, you have to replace the MODULE_NAME with the name of the module.
```php
php artisan module:build MODULE_NAME
```
You may want to use `--force` option to overwrite the existing module. if you use this option, it will replace all the existing files with the default stub files.
```php
php artisan module:build MODULE_NAME --force
```
## Clear All Cache
```bash
composer clear-all
```
this is a shortcut command to clear all cache including config, route, and more
## Code Style Fix
We are now using `Laravel Pint` to make the code style stay as clean and consistent as the Laravel Framework. Use the following command to apply CS-Fix.
```bash
composer pint
```
Along with Laravel Pint, we are using `prettier` to format the blade templates. You can install the `prettier` extension in your favorite editor.
The following command will format the blade templates.
```bash
npm run format
```
or if you are using `yarn` then you can use the following command.
```bash
yarn format
```
## Role - Permissions
Several custom commands are available to add and update `role-permissions`. Please read the [Role - Permission Wiki page](https://github.com/nasirkhan/laravel-starter/wiki/Role-Permission), where you will find the list of commands with examples.
# Features
The `Laravel Starter` comes with several features which are the most common in almost all applications. It is a template project which means it is intended to be built in a way that it can be used for other projects.
It is a modular application, and some modules are installed by default. It will be helpful to use it as a base for future applications.
* Admin feature and public views are completely separated as `Backend` and `Frontend` namespace.
* Major features are developed as `Modules`. A module like Posts, Comments, and Tags are separated from the core features like User, Role, Permission
## Core Features
* User Authentication
* Social Login
* Google
* Facebook
* Github
* Build in a way adding more is much easier now
* User Profile with Avatar
* Role-Permissions for Users
* Dynamic Menu System
* Language Switcher
* Localization enabled across the project
* Backend Theme
* Bootstrap 5, CoreUI
* Fontawesome 6
* Dark Mode
* Frontend Theme
* Tailwind
* Fontawesome 6
* Dark Mode
* Article Module
* Posts
* Categories
* Tags
* Comments
* wysiwyg editor
* File browser
* Application Settings
* External Libraries
* Bootstrap 5
* Fontawesome 6
* CoreUI
* Tailwind
* Datatables
* Select2
* Date Time Picker
* Backup (Source, Files, Database as Zip)
* Log Viewer
* Notification
* Dashboard and details view
# User Guide
## Installation
Follow the steps mentioned below to install and run the project. You may find more details about the installation in [Installation Wiki](https://github.com/nasirkhan/laravel-starter/wiki/Installation).
### From GitHub Template (recommended)
If you created a new repository from this GitHub template, or cloned it directly:
```bash
# 1. Install PHP dependencies
composer install
# 2. Run the interactive setup wizard — handles .env, database, migrations, seeding, and npm assets
php artisan starter:install
```
Or as a single shortcut after `composer install`:
```bash
composer setup
```
For a true one-liner from a fresh clone, convenience scripts are included:
```bash
# Linux / macOS
bash setup.sh
# Windows (PowerShell)
.\setup.ps1
```
Both scripts run `composer install` and then launch `php artisan starter:install`.
Pass any `starter:install` flags through, e.g. `bash setup.sh --demo`.
The setup wizard will guide you through environment configuration, database selection, migrations, seeding, and building frontend assets. When finished it prints the app URL and default login credentials.
**Available options:**
| Option | Description |
|---|---|
| `--skip-db` | Skip database setup |
| `--skip-seed` | Skip database seeding |
| `--skip-npm` | Skip `npm install` and asset build |
| `--demo` | Seed with demo data (no prompt) |
### Via Composer create-project
```bash
composer create-project nasirkhan/laravel-starter
```
This runs migrations automatically. Afterwards run the setup wizard to seed and build assets:
```bash
php artisan starter:install --skip-db
```
*After creating the new permissions use the following commands to update cached permissions.*
`php artisan cache:forget spatie.permission.cache`
## Database Seeding
Two seeder categories are available:
- **Essential** (always run): users, roles, permissions, menu — `AuthTableSeeder`, `MenuDatabaseSeeder`
- **Dummy data** (optional): posts, categories, tags — disabled via `SEED_DUMMY_DATA=false` in `.env`
```bash
# Full seed (essential + dummy data)
php artisan migrate:fresh --seed
# Essential data only
php artisan db:seed-essential --fresh
# Add or refresh demo content at any time
php artisan laravel-starter:insert-demo-data
php artisan laravel-starter:insert-demo-data --fresh
```
For production, set `SEED_DUMMY_DATA=false` and use `--force`:
```bash
php artisan db:seed-essential --fresh --force
```
## Docker and Laravel Sail
This project is configured with Laravel Sail (https://laravel.com/docs/sail). You can use all the docker functionalities here. To install using docker and sail:
1. Clone or download the repository
2. Go to the project directory and run `composer install`
3. Create `.env` file by copying the `.env-sail`. You may use the command to do that `cp .env-sail .env`
4. Update the database name and credentials in `.env` file
5. Run the command `sail up` (consider adding this to your alias: `alias sail='[ -f sail ] && sh sail || sh vendor/bin/sail'`)
6. Run the command `sail artisan migrate --seed`
7. Link storage directory: `sail artisan storage:link`
8. Since Sail is already up, you can just visit http://localhost:80
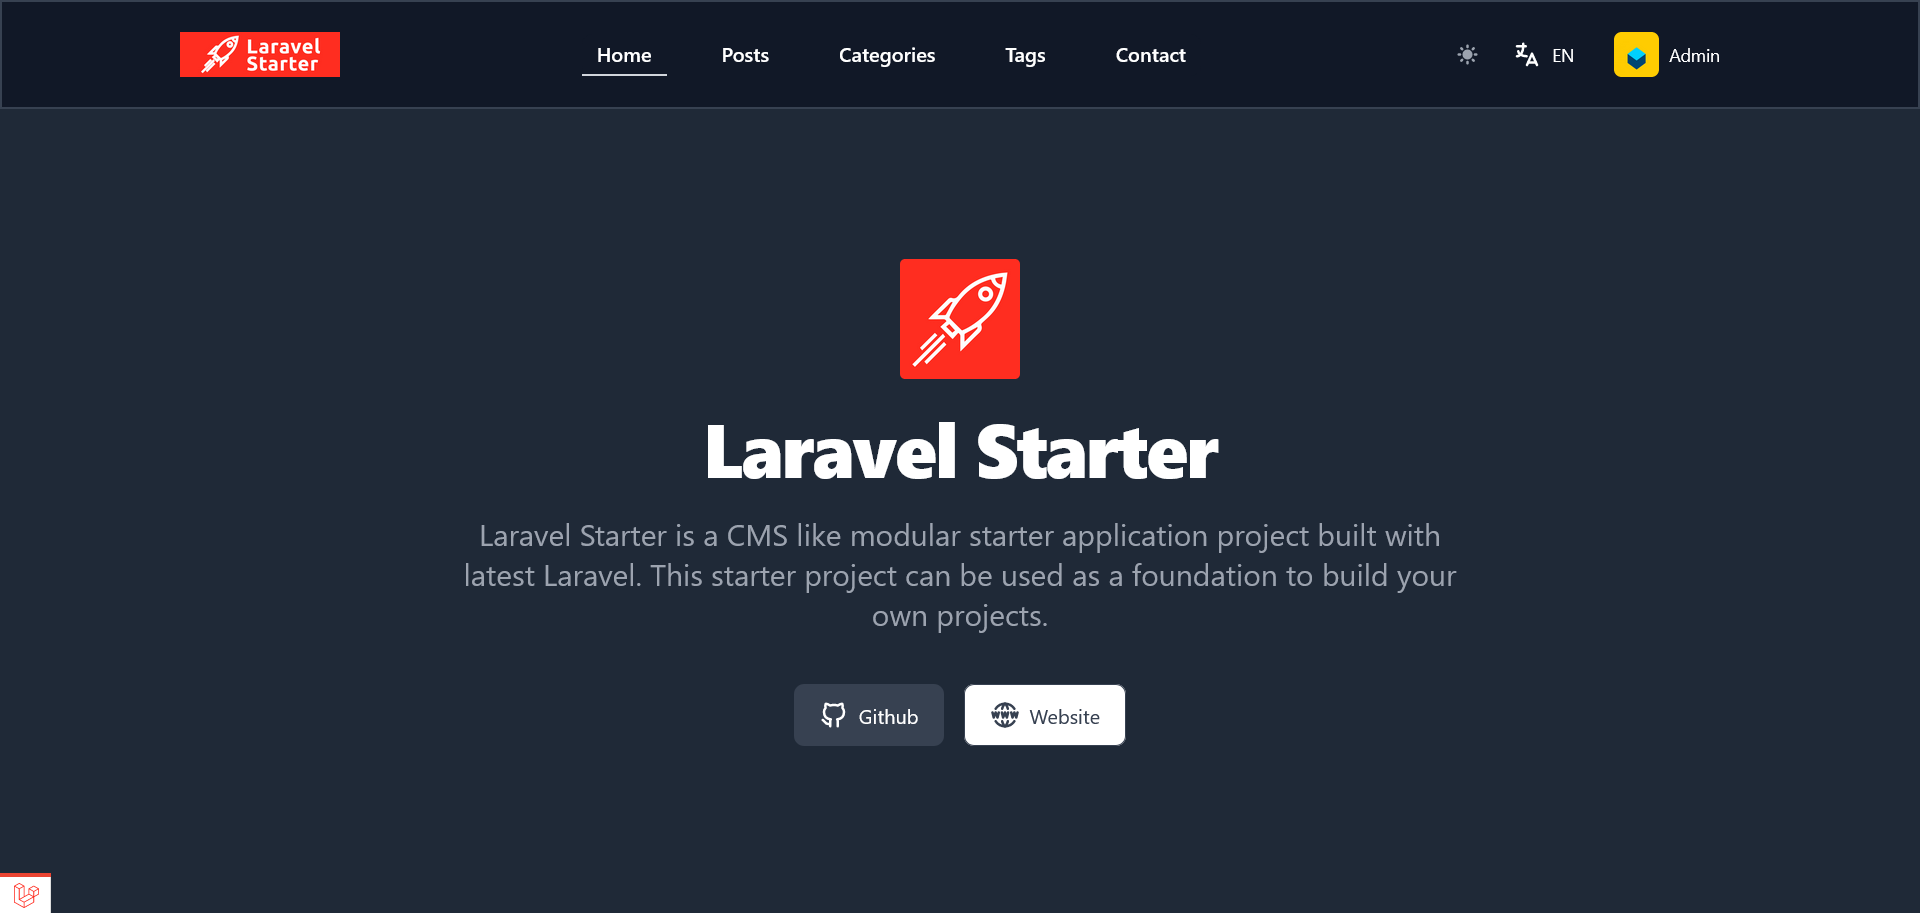
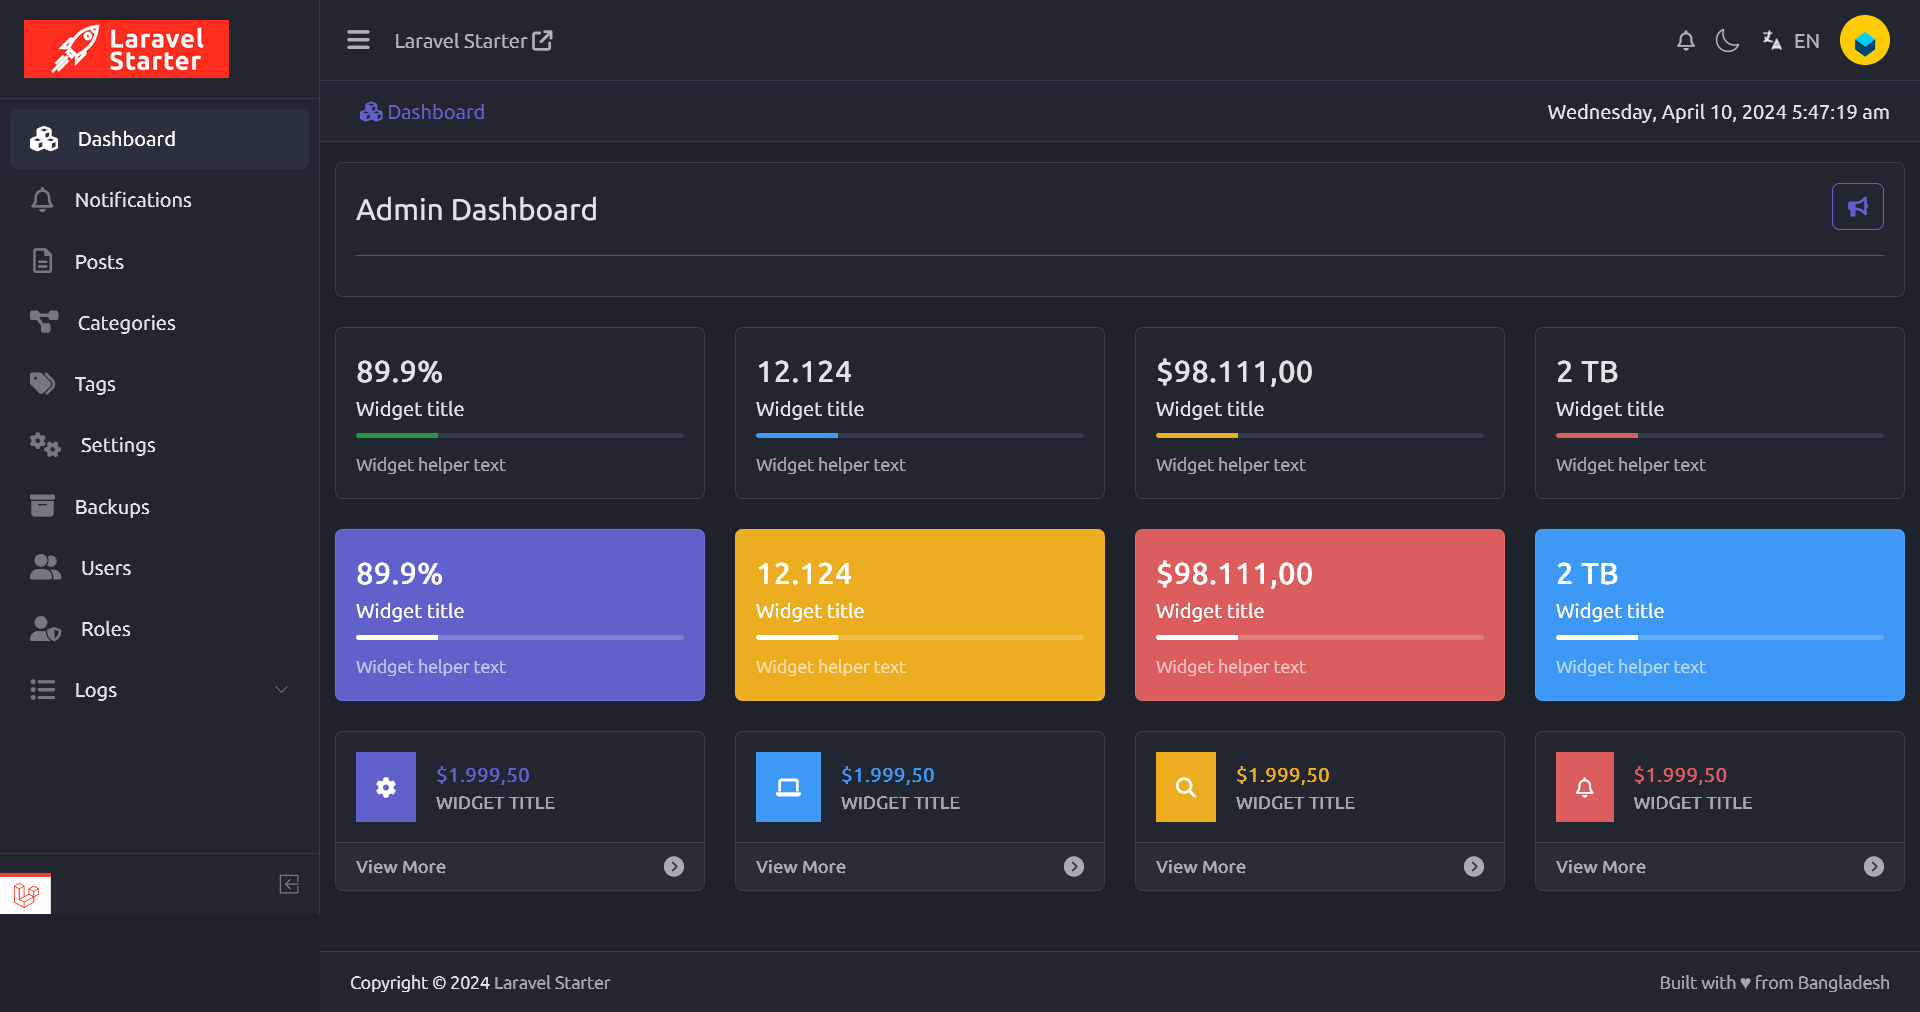
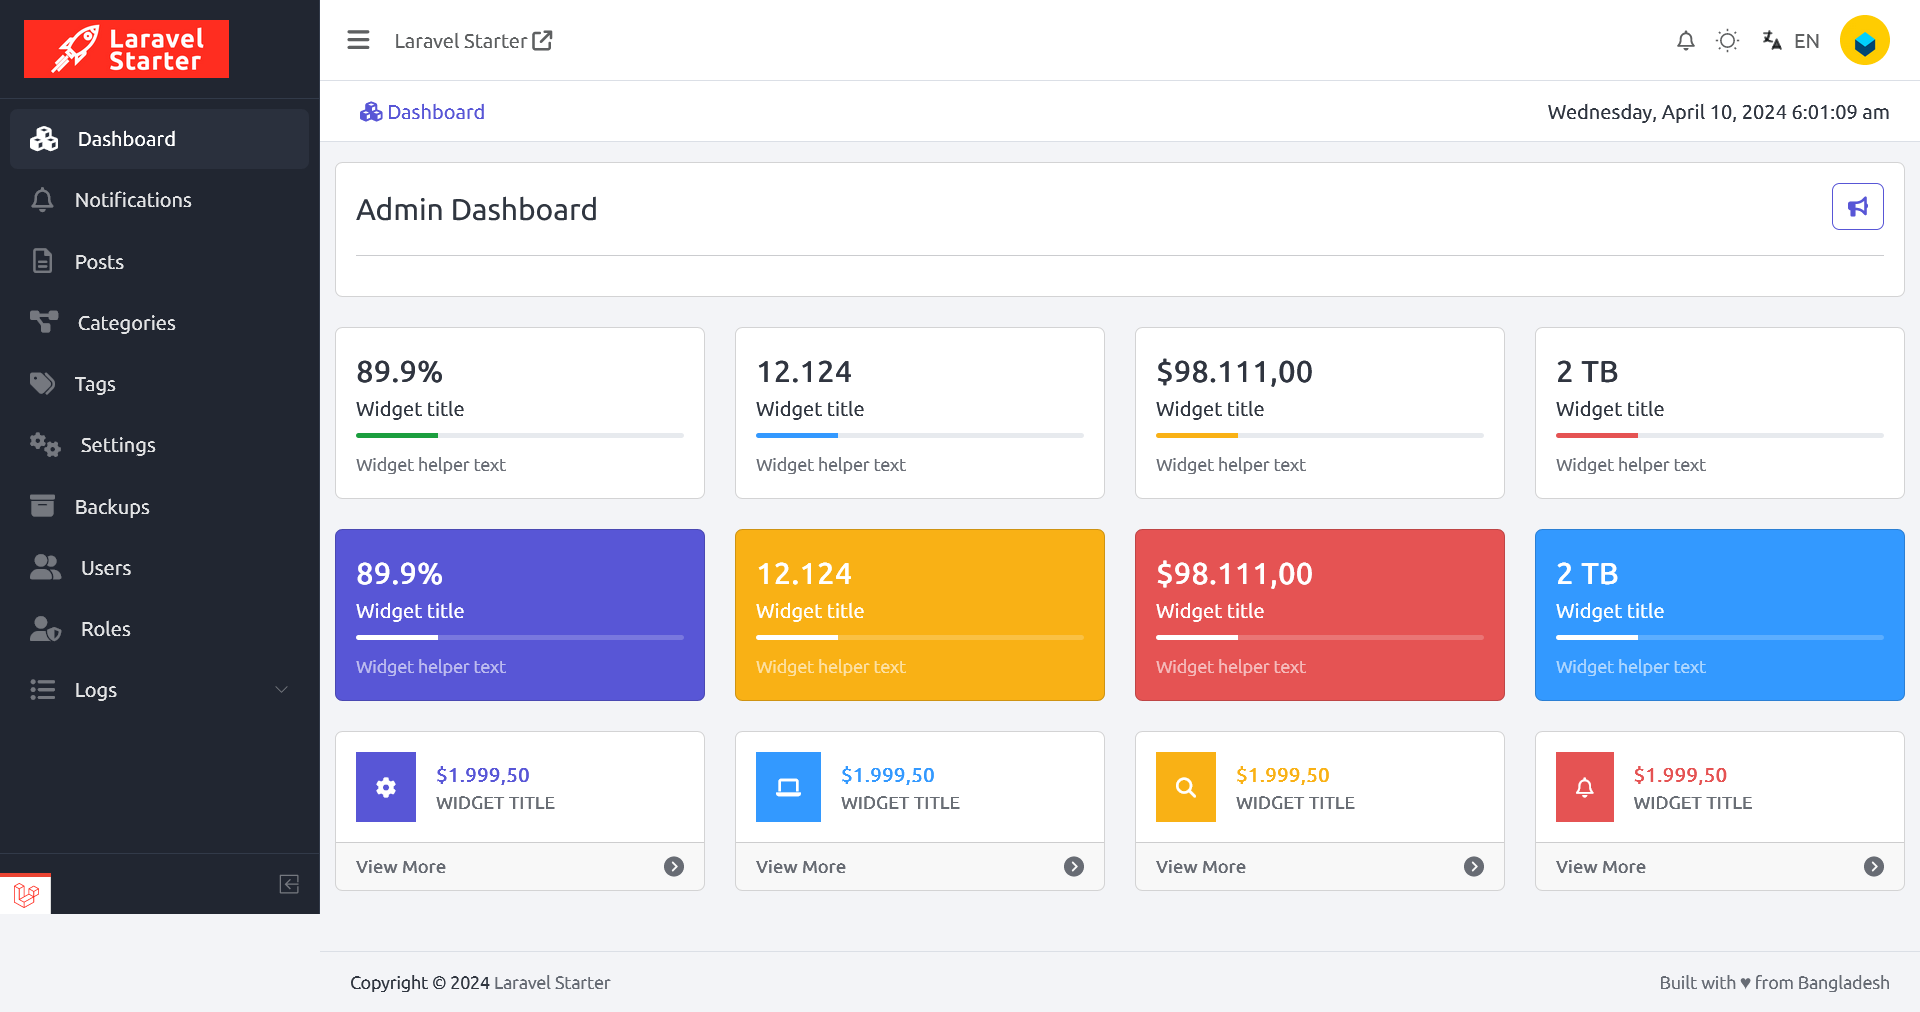
# Screenshots
__Home Page__

__Login Page__

__Posts Page__

__Backend Dashboard__
---

---

", Assign "at most 3 tags" to the expected json: {"id":"9701","tags":[]} "only from the tags list I provide: []" returns me the "expected json"